
There is something deeply personal about a backyard. It is your escape — the place where you exhale after a long day, where kids run barefoot through the grass, where summer dinners stretch long past sunset. But when the heat hits hard and the sun turns brutal, that sanctuary shrinks. You stop going outside. The furniture sits empty. The backyard you worked so hard to build becomes a space you only admire through a window.
That is exactly why the right shade solution changes everything. Not just practically — emotionally. A well-designed sun shade sail turns a harsh, unusable yard into a place you actually want to be. This guide covers five of the best sun shade sail ideas for backyards in 2026, from triangle setups to DIY builds to sails glowing with lights at night. If you want your outdoor space back, this is where you start.
Modern Architectural Sun Shade Sails For Stylish Outdoor Living
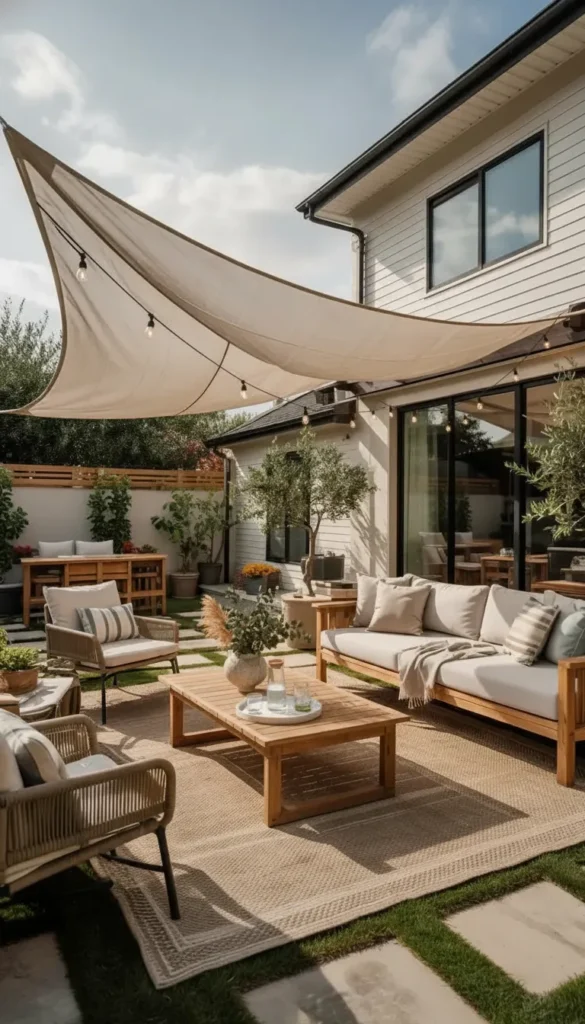
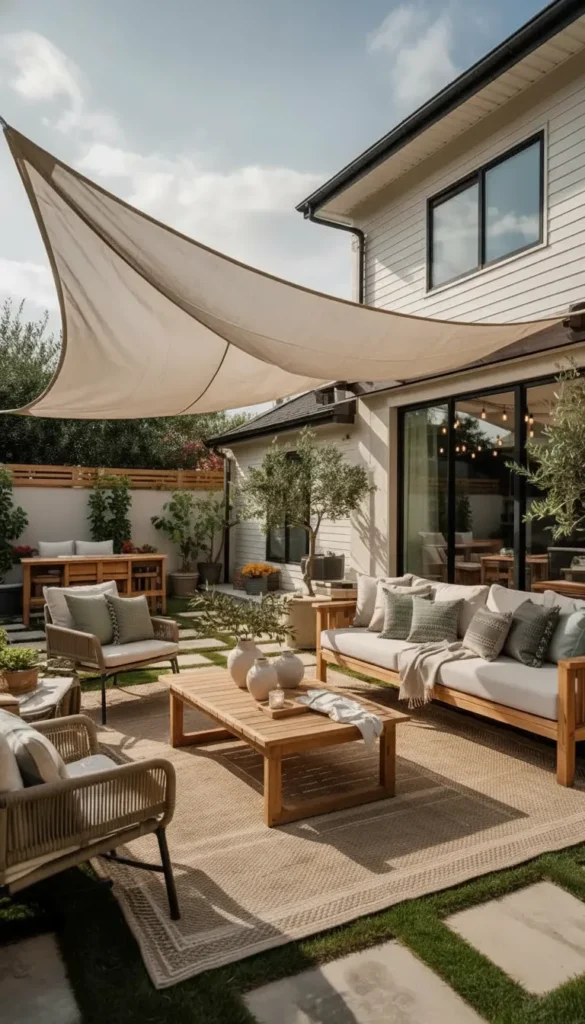
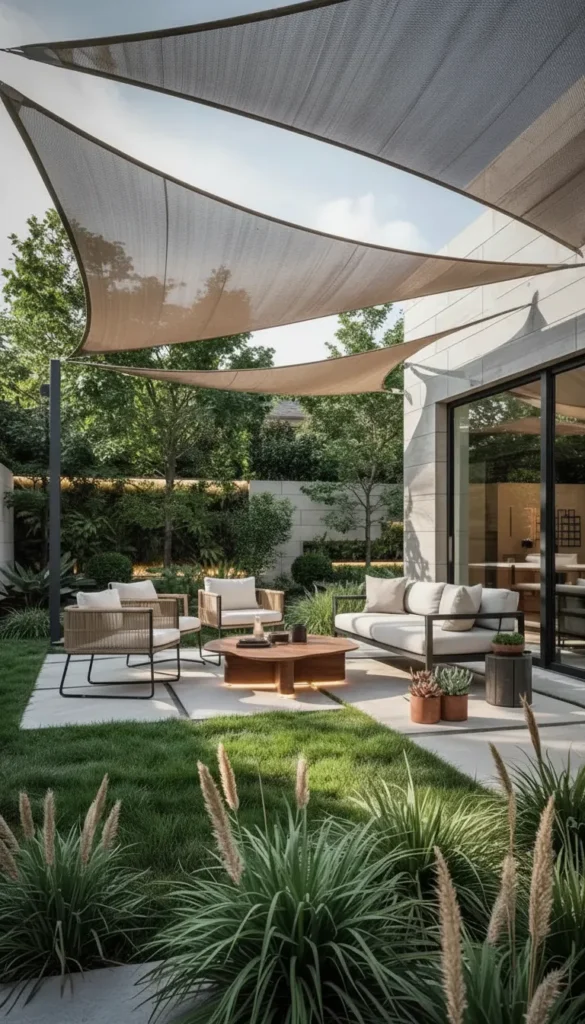
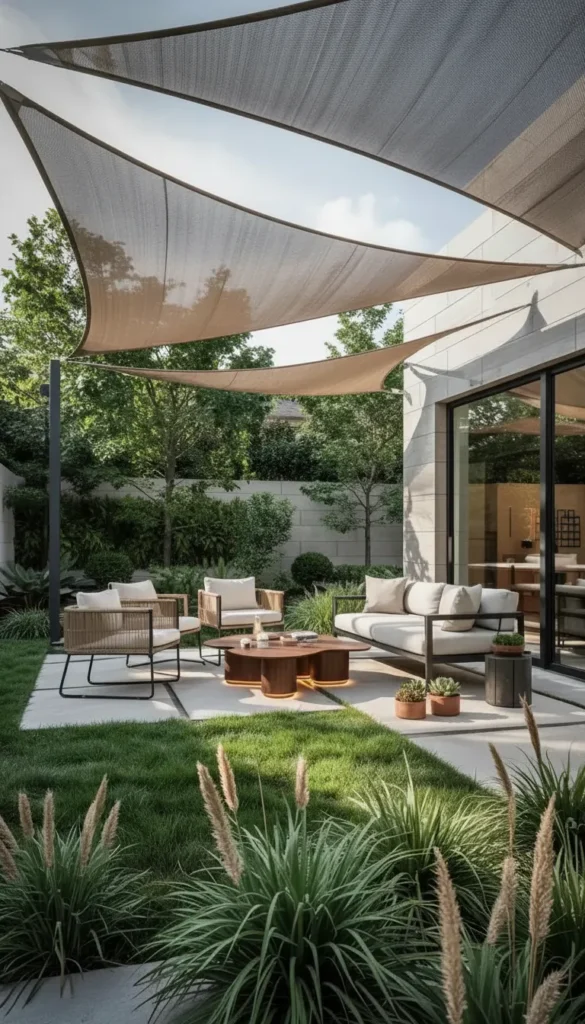
The first thing most people notice about a beautifully designed backyard is how effortless it looks. Clean lines. Open air. A sense that everything belongs. Modern architectural shade sails deliver exactly that feeling — structure without heaviness, shade without walls.
This style stretches large, geometric sails between wooden posts or directly off a house wall. The result is a shaded lounge area that feels like a natural extension of your home. It works especially well for patios with outdoor seating, coffee tables, and garden views.
Why This Style Works So Well
Modern shade sails succeed where other options fail because they are simultaneously functional and beautiful.
- They create shade without blocking natural light or garden views
- Their clean geometry complements modern and transitional home architecture
- They feel airy and open, unlike heavy pergolas or solid awnings
- They can be removed seasonally, giving you full flexibility year-round
Unlike a traditional pergola, a sail does not anchor you to one fixed aesthetic forever. You can change the color, reposition the posts, or swap to a larger sail as your outdoor space evolves.
Choosing The Right Scale And Proportion
Getting the size right is the single most important step in this design.
- Small patios (under 200 sq ft): One 12×12 or 14×14 sail is usually enough
- Medium patios (200–400 sq ft): A 16×16 or 18×18 sail works well, or two smaller sails
- Large outdoor areas: Use multiple sails staggered at slightly different heights for layered coverage
The sail should extend at least 2–3 feet beyond your seating area on each side. This ensures full shade during mid-morning and late afternoon when the sun comes in at an angle.
Selecting Furniture That Complements The Look
The sail sets the architectural tone, but furniture brings the space to life.
- Modular outdoor sectionals in sand, cream, or warm gray pair beautifully with neutral sails
- Teak coffee tables and woven lounge chairs add organic warmth to the clean lines
- Textured outdoor rugs define the seating zone and anchor the furniture
- Oversized planters with ornamental grasses or olive trees soften the structure
Stick to a limited color palette. Two or three tones — ideally earth-based neutrals — keep the space cohesive and visually calm.
Softening The Architecture With Plants
Hard lines need organic balance. Greenery is what makes an architectural sail feel like it belongs in a garden rather than an airport terminal.
- Tall grasses or bamboo planted near posts blur the base of the structure
- Climbing plants on a nearby trellis connect the sail to the surrounding landscape
- Potted lavender or rosemary adds fragrance and texture at ground level
- A low hedge bordering the patio creates a sense of enclosure without walls
Pin this modern shade sail design! 📌
Post Materials And Mounting Options
Your mounting method affects both the look and the longevity of your installation.
- Wooden posts feel warm and natural — choose pressure-treated cedar or redwood
- Steel posts offer a more industrial or contemporary look with greater durability
- Wall-mounted options work well when one side of the sail anchors directly to your home
- Always use stainless steel hardware — it resists rust and holds tension over time
For freestanding posts, bury them at least 24 inches deep in concrete footings. This prevents leaning and keeps the sail taut through wind and storms.
Extending Into The Evening With Lighting
One of the biggest mistakes homeowners make is designing for daytime only.
- Hang Edison bulb string lights from the sail corners to warm corners for evening use
- Mount directional spotlights on posts aimed upward to highlight the underside of the sail
- Use solar-powered lanterns on side tables for a soft, portable glow
- Embed low-voltage path lights around the patio perimeter for safety and ambiance
A shade sail lit from below at night becomes a glowing architectural canopy. It transforms your patio from a daytime retreat into an evening destination.
The Closing Principle
Modern architectural shade sails are not just outdoor furniture. They are a design statement. They say you take your outdoor space seriously — that it is an extension of your home, not an afterthought. Start with the right scale, choose neutral tones, pair with quality furniture, and light it properly. The result will feel like a resort, not just a backyard.
Save this modern shade sail strategy! 📌
Creative Zone-Based Sun Shade Sail Ideas For Patios And Gardens
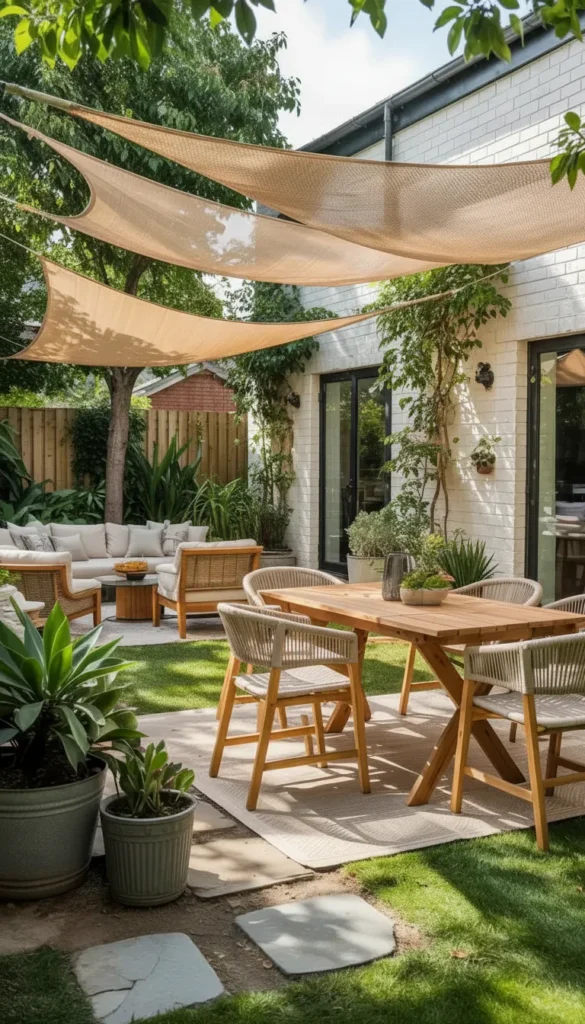
Most backyards have one fatal flaw: they feel like one giant undifferentiated space. There is no dining spot. No lounging corner. No clear place to sit, eat, or relax. Everything bleeds into everything, and the yard ends up feeling messy rather than welcoming.
Zone-based shade sail design solves this immediately. Instead of covering the whole yard with one large sail, you use two or more separate sails to define specific activity areas. One over the dining table. One over the lounge chairs. Each zone becomes its own outdoor room.
The Psychology Of Outdoor Zones
Defined spaces feel intentional. When a yard is thoughtfully zoned, people naturally move through it differently.
- Guests settle into designated areas rather than clustering awkwardly
- Children know where play ends and the adult lounge begins
- Outdoor dining feels more like a restaurant experience, less like a picnic
- Each zone can be furnished and decorated independently
The goal is organization without rigidity. Sails create soft boundaries — visual cues rather than physical walls.
Designing The Dining Zone
The dining area is usually the most important zone in a backyard.
- Choose a sail that extends 2 feet past the table on all sides for full midday shade
- A square sail works better than a triangle over a rectangular dining table
- Neutral tones like sand, stone, or soft white reflect less heat than dark colors
- Anchor the sail to the house wall on one side to reduce the number of posts needed
Pair the shaded dining zone with a solid wood or concrete table, durable outdoor chairs with cushions, and a small buffet or outdoor bar cart nearby. This creates a complete entertaining setup.
Designing The Lounge Zone
The lounge zone deserves just as much attention as the dining area.
- Position this sail slightly lower and more angled than the dining sail for visual variation
- A triangle sail works beautifully over a corner lounge setup, pointing toward the seating
- Use deep sofas, ottomans, and a coffee table to make the area feel like an outdoor living room
- Add a side table with a lamp or lantern to signal that this is a comfortable, lingering space
The lounging zone should feel protected. A lower sail over this area creates a sense of enclosure that makes people want to settle in and stay.
Balancing Shade And Open Sky
This is where many homeowners overcorrect. They add too many sails and end up blocking the very thing that makes being outside appealing — the open sky.
- Leave deliberate gaps between sails to allow natural light into pathways and planted areas
- Keep at least 30–40% of the yard open to sky to maintain the outdoor feeling
- Use lighter, more breathable sail fabric in areas where airflow matters
- Angle the sails so edges do not overlap directly — stagger them for layered depth
Pin this zone-based shade strategy! 📌

Integrating Plants Into The Zoned Layout
Plants are the connective tissue between your zones.
- Use low hedges or ornamental grasses to define the border between zones without fencing
- Place tall container plants at the corner of each sail zone as visual anchors
- Add climbing vines on any trellis or wall nearby to soften the transition into the garden
- Line the path between zones with solar-powered stake lights for nighttime navigation
Choosing Colors For A Cohesive Multi-Sail Look
When using multiple sails, color coordination becomes critical.
- Same color, different shapes creates a unified look across zones
- Tonal variations (cream and sand, for example) add visual interest without clashing
- Avoid using more than two colors across all sails in one yard
- Always match sail tones to the dominant color of your home’s exterior or hardscaping
The Accessory Layer That Ties It All Together
Accessories are what make zones feel finished rather than staged.
- Outdoor rugs in each zone anchor the furniture and define the footprint
- Throw pillows in complementary patterns connect the zones visually
- Matching lanterns or string lights across both zones create visual consistency
- A shared planter or feature tree between zones acts as a natural centerpiece
Save this creative zoning approach! 📌
The Closing Principle
Zone-based shade sail design is the single most impactful upgrade you can make to a medium or large backyard. It takes a chaotic outdoor space and gives it structure, purpose, and personality — without building a single permanent wall. Two sails, the right furniture, and a thoughtful plant layout can completely transform how your family and guests use the yard.
Triangle Sun Shade Sail Ideas For A Modern Geometric Backyard Look
There is a reason triangle sails are having a major moment in 2026. They are visually striking in a way that square sails simply are not. The diagonal lines of a triangle sail add movement and energy to a backyard. They feel modern, sculptural, and intentional.
A triangle sail positioned above an outdoor seating area does not just create shade — it creates a visual centerpiece. When done right, it is the first thing guests notice when they step into your yard.
Why Triangle Sails Feel More Contemporary
Geometry matters in design. Rectangles and squares feel stable and traditional. Triangles feel dynamic and forward-looking.
- The angled edge of a triangle sail directs the eye across the space
- Diagonal lines contrast beautifully with the horizontal planes of patios and lawns
- Triangle sails look especially striking over concrete, stone, or gravel surfaces
- They are easier to position in smaller or irregular-shaped patios than square sails
This is the shade style most commonly seen in boutique hotels and high-end residential design.
Choosing The Right Triangle Size
Not all triangle sails are created equal. Proportion is everything.
- For a small patio (under 150 sq ft), a 10x10x10 equilateral triangle is ideal
- For medium-sized seating areas, a 14x14x14 or 16x16x16 triangle provides better coverage
- Right-triangle sails (with one 90-degree corner) work well in corner patio layouts
- Always ensure at least two anchor points are higher than the third to create proper drainage slope
A flat, horizontal sail pools water and sags. A properly angled triangle sheds rain and maintains its shape.
Pin this triangle shade design! 📌
Furniture Pairings That Complement Triangle Geometry
Furniture selection is where this design gets elevated from good to great.
- Low-profile lounge chairs with clean lines mirror the minimalist geometry of the sail
- Metal-framed tables in matte black or brushed steel reinforce the contemporary feel
- Minimalist outdoor sofas with solid-color cushions keep the focus on the sail above
- Avoid overly ornate or rustic furniture — it fights with the modern geometry of the sail
Choose one statement furniture piece — like a hanging egg chair or a sculptural concrete table — and keep everything else simple.
Color Choices For Triangle Sails
Color communicates mood. Triangle sails in particular benefit from careful color selection.
- Beige and sand tones are the most versatile and blend with almost any landscape
- Charcoal gray reads as sophisticated and modern, especially with metal furniture
- Soft white creates a bright, Mediterranean feel on sunny days
- Terracotta or dusty olive adds warmth and ties into natural garden palettes
Avoid bold or saturated colors. They fade faster in UV exposure and can overwhelm the backyard aesthetic over time.
Ground Materials That Enhance The Geometric Look
What is under the sail matters as much as what is above it.
- Decomposed granite or pea gravel creates a clean, minimalist floor that frames the geometry
- Concrete pavers in a grid pattern reinforce the angular, modern feel
- Large-format porcelain tiles add a luxury touch, especially in contemporary homes
- Composite decking in a straight-lay pattern provides warmth without sacrificing modernity
Avoid irregular flagstone or busy mosaic patterns beneath a triangle sail — they compete with the overhead geometry instead of supporting it.
Landscaping That Frames The Triangle
Save this geometric shade design strategy! 📌
The right plants turn a triangle sail from a structure into a landscape feature.
- Plant tall ornamental grasses near anchor posts to echo the diagonal lines of the sail
- Use boxwood spheres or topiaries to contrast the angular sail with soft, rounded forms
- Line the perimeter with agave, yucca, or aloe for a desert-modern aesthetic
- Add raised planters in geometric shapes (square, rectangular) to reinforce the design language
The Closing Principle
Triangle shade sails bring an architectural confidence to a backyard that other shade solutions cannot match. They are bold, sculptural, and distinctly modern. Combined with clean-lined furniture, thoughtful ground materials, and complementary landscaping, a triangle sail setup can make even a modest patio feel like a curated outdoor room from an architecture magazine.
Layered Triangle Sun Shade Sail Ideas For Dynamic, Multi-Level Shade
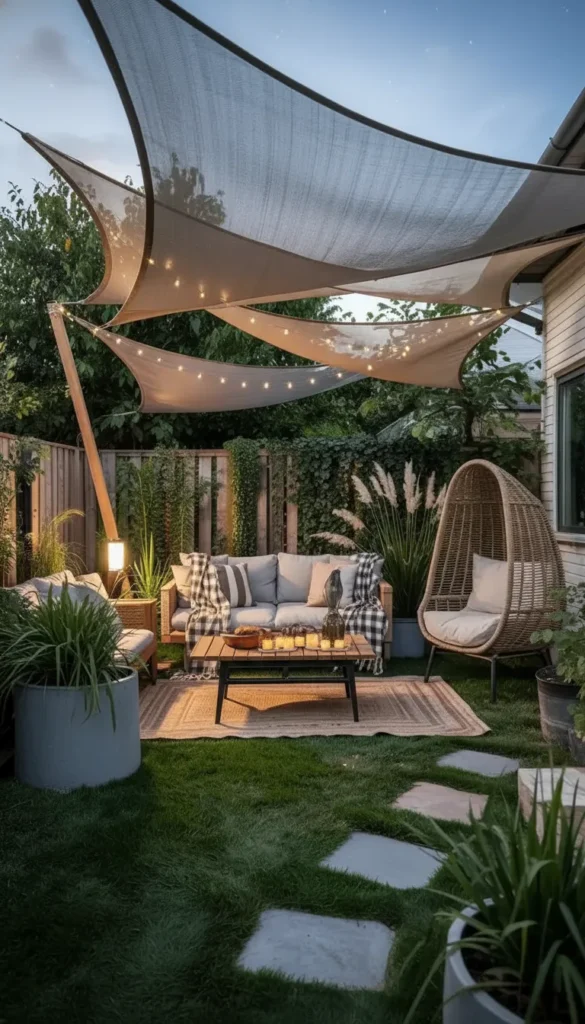
If a single triangle sail is striking, multiple layered triangle sails are breathtaking. Layered sail installations are one of the most dramatic shade trends in backyard design right now — and for very good reason.
Instead of one flat canopy, layered sails create a sculpted, three-dimensional overhead experience. They move differently in the breeze. They cast shifting, overlapping shadows. They look as interesting from inside the house looking out as they do from beneath them.
How Layering Works Structurally
Layered installations require careful planning, but the result is worth every measurement.
- Use three or more triangular sails positioned at different heights above the same seating area
- Vary the attachment height by 12–24 inches between each sail for a staggered effect
- Overlap the sails by 20–30% to ensure continuous shade coverage throughout the day
- Use different-sized triangles for visual rhythm — large, medium, and small creates natural hierarchy
The overlapping edges should never be directly parallel. Slight angular variation between sails creates the sculptural, organic feel that makes this design special.
The Visual Impact Of Multiple Shadows
One of the most underappreciated aspects of layered sails is what they do to light.
- Each sail casts a slightly different shadow pattern depending on sun angle
- As the day progresses, shadows shift and overlap in constantly changing ways
- In the late afternoon, the layered shadows create dramatic geometric patterns on the ground
- At midday, the combined sails ensure full shade coverage even as the sun moves overhead
This means the space looks different at every hour of the day. It is never static. It is a living, changing overhead environment.
Pin this layered shade sail design! 📌
Furniture For A Layered Sail Setup
The furniture beneath layered sails needs to be comfortable and visually calm.
- Large outdoor sofas with deep cushions anchor the space beneath the canopy
- Hanging egg chairs or hammock chairs suspended from a beam or post add a playful element
- Wooden coffee tables with live-edge or natural finishes bring organic warmth
- Outdoor ottomans that double as extra seating keep the zone flexible for different group sizes
Avoid clutter. A layered sail setup is visually complex overhead — keep the ground level simple and uncluttered so the canopy can do its work.
Fabric Choices For Layered Installations
When using multiple sails, fabric selection becomes more nuanced.
- HDPE (high-density polyethylene) fabric is ideal — it allows airflow while blocking up to 90% of UV rays
- Use the same fabric type across all sails for consistent texture and weathering
- Choose varying tones of the same color family for sails at different heights — lighter on top, slightly deeper underneath
- Make sure all fabrics are rated for outdoor UV and water resistance
The tonal variation between layers creates depth without introducing visual conflict.
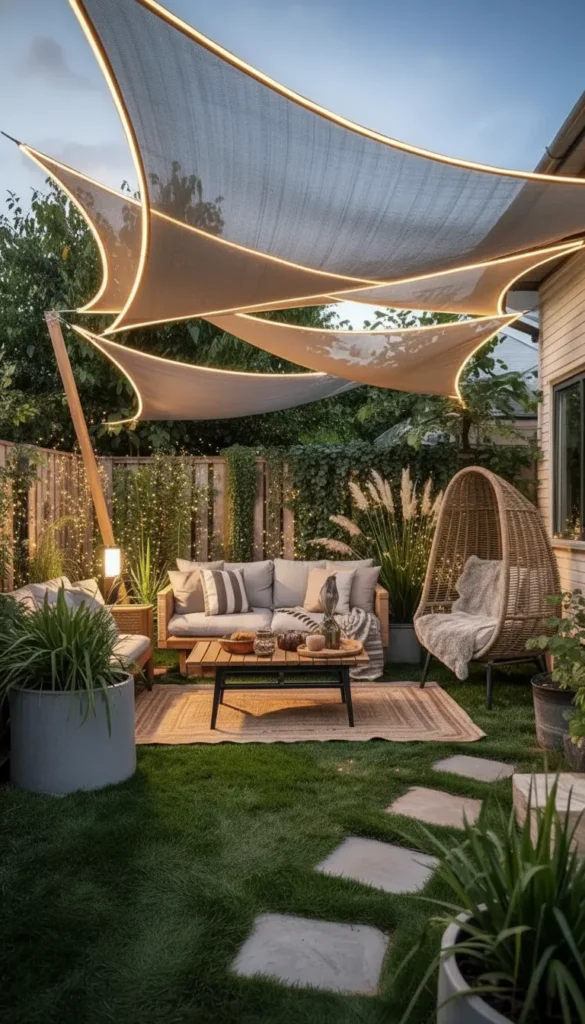
Lighting A Layered Sail Installation
This is where the design transforms from a daytime feature to a 24-hour experience.
- Drape warm LED string lights between the lower sail anchors for intimate evening ambiance
- Use uplighting from below to illuminate the underside of the sails at night
- Install spotlights on posts directed at specific sails to create dramatic shadow play
- Add lanterns at ground level to balance the overhead light with warmth at human scale
A layered sail setup lit from multiple directions at night looks like an outdoor art installation. It is the kind of thing guests photograph and talk about for years.
Wind Considerations For Multi-Sail Setups
Layered sails require more attention to wind loading than single-sail installations.
- Use marine-grade stainless steel turnbuckles at each anchor point for easy tension adjustment
- Ensure every post is set in concrete footings at least 24 inches deep
- In high-wind areas, consider releasing or furling one or more sails during major storms
- Check tension monthly during sailing season — UV exposure loosens fabric slightly over time
Save this layered sail installation guide! 📌
The Closing Principle
Layered triangle shade sails represent the highest expression of shade sail design. They are complex to plan, require precise installation, and demand thoughtful furniture and lighting choices. But the result is extraordinary — a backyard space that feels genuinely architectural, deeply comfortable, and visually unforgettable. This is not just shade. This is an experience.
Sun Shade Sail Ideas Backyards DIY Projects For Affordable, Beautiful Shade
Not every great backyard starts with a big budget. Some of the most charming, functional, and stylish shade sail setups in 2026 were built by homeowners with a drill, a weekend, and a clear plan. DIY shade sail installation is more achievable than most people think — and the results can be just as polished as professional installs when done thoughtfully.
This section walks you through everything you need to know to design, build, and finish a DIY shade sail setup that looks intentional, not improvised.
Why DIY Shade Sails Are Worth Considering
The financial case is compelling. But there are other reasons too.
- Professional installation for a single shade sail typically runs $500–$1,500 depending on complexity
- DIY installation with quality materials usually costs $150–$500, including posts and hardware
- The process is genuinely learnable — most homeowners with basic tools can complete it in a day
- A DIY install gives you complete control over placement, angle, and attachment points
- You gain the knowledge to adjust tension or reposition the sail as your yard evolves
The confidence that comes from building something yourself in your own backyard is a bonus that does not show up on any spreadsheet.
Planning Your DIY Installation
Before buying anything, plan everything.
- Measure your space carefully. Note the exact square footage of the area you want to shade.
- Sketch your anchor points. Where will the sail attach? Posts? House wall? Fence? Existing structure?
- Calculate sun angles. Observe where the sun hits your patio at different times of day. This determines the optimal sail orientation.
- Check local regulations. Some municipalities require permits for post installation in concrete. Verify before you dig.
A one-hour planning session prevents a weekend of frustrating rework.
Pin this DIY shade sail planning guide! 📌
Choosing The Right DIY Materials
Quality materials make the difference between a sail that lasts three seasons and one that lasts a decade.
- Sail fabric: Choose 185 GSM or heavier HDPE. Look for sails rated for at least 90% UV blocking and with a minimum 5-year warranty.
- Posts: Use 4×4 or 6×6 pressure-treated lumber for wooden posts. For a more modern look, use galvanized steel pipe in 2-inch diameter.
- Hardware: Every attachment point should use 316-grade stainless steel — turnbuckles, D-rings, eye hooks, and snap hooks. Never use plated or galvanized-only hardware outdoors.
- Concrete: For post footings, use fast-setting concrete mix (60 lb bags) — one bag per post for 4×4 posts, two bags for larger posts.
Spending an extra $30–$50 on hardware quality will save you from a failed installation six months later.
Step-By-Step DIY Installation Process
Follow this sequence for a clean, professional-looking result.
- Mark post locations using stakes and string. Verify right angles with a 3-4-5 triangle measurement.
- Dig post holes at least 24 inches deep — deeper in freeze-thaw climates (30+ inches).
- Mix and pour concrete into holes, insert posts, and check for plumb (vertical) with a level.
- Allow 24–48 hours for concrete to cure before applying any load.
- Install stainless steel eye hooks at the top of each post and at wall anchor points.
- Attach turnbuckles to each anchor point using D-rings and snap hooks.
- Clip the sail to the turnbuckles at each corner, starting with the highest attachment point.
- Tension the sail evenly by adjusting each turnbuckle gradually — alternate between corners to avoid warping.
- Check drainage slope. One corner should be at least 12 inches lower than the opposite corner to shed rain.
- Trim any excess rope or cable and secure loose ends with cable clips.
Take photographs as you work. If you need to reinstall or reposition later, the photos become invaluable reference.
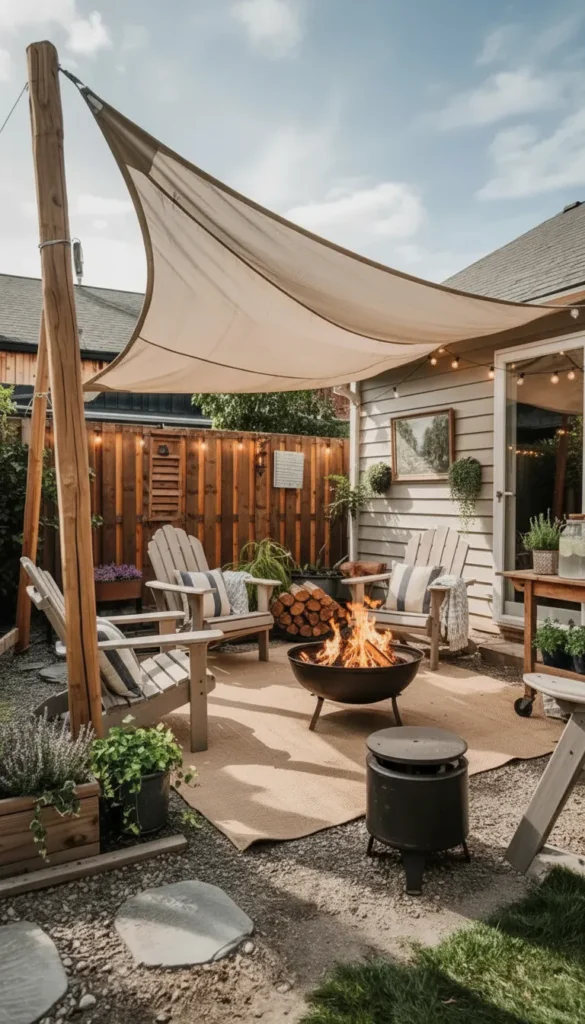
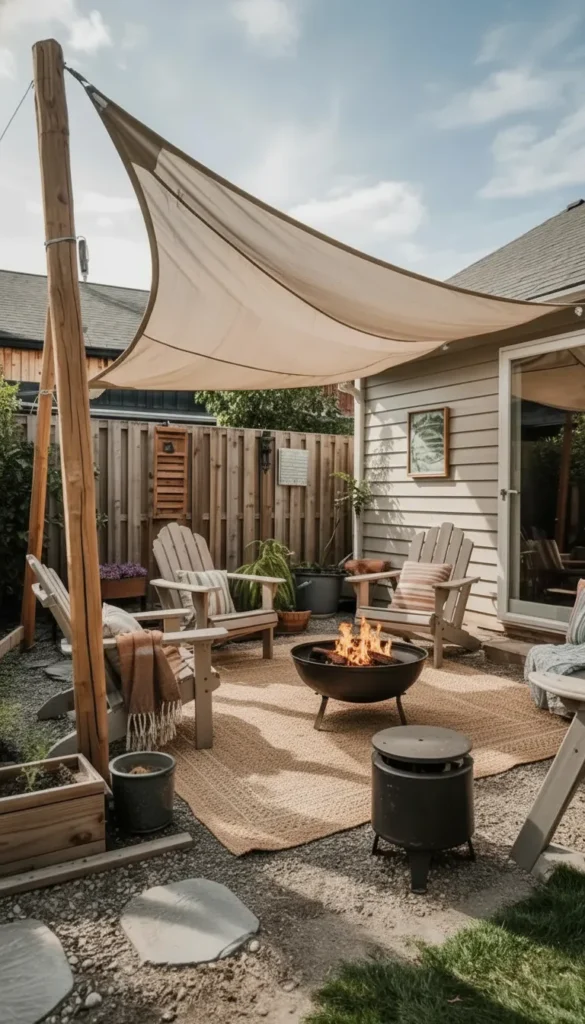
Styling Your DIY Shade Sail Space
A great DIY installation deserves great finishing touches.
- Adirondack chairs are a classic, affordable seating option that works under any sail style
- A fire pit table at the center of the seating zone adds warmth and a social focal point
- Outdoor rugs define the seating area and make the space feel more finished
- Hanging solar lanterns from the sail corners extend usability into the evening without electrical work
- Galvanized metal planters filled with herbs or flowers add personality and practicality
The goal is to make the DIY installation look like it was always meant to be there. Thoughtful styling accomplishes that.
Maintenance That Keeps Your DIY Sail Looking Great
A well-maintained sail lasts years longer than one that is ignored.
- Clean the sail fabric twice per season with mild soap and water — do not use bleach or pressure washers
- Remove the sail during winter if you live in a freeze-thaw climate to prevent fabric damage from ice
- Inspect hardware quarterly — check for corrosion, loose connections, and tension changes
- Re-tension the sail each spring after reinstallation — fabric relaxes over winter storage
- Treat wooden posts annually with exterior wood sealer to prevent cracking and rot
A 30-minute maintenance session twice a year protects your entire investment.
Save this DIY shade sail installation approach! 📌
Common DIY Mistakes To Avoid
Learning from others’ mistakes is always faster than making your own.
- Installing posts too shallow — always go at least 24 inches deep, more in soft or sandy soil
- Using hardware that is too small — undersized turnbuckles and D-rings are the number-one cause of sail failure
- Installing the sail flat — a flat sail pools water and strains the anchors; always maintain a slope
- Anchoring to a fence — residential fences rarely have the structural strength to handle sail tension
- Buying a sail that is too large for DIY — anything over 20 feet per side should be professionally installed
The Closing Principle
A DIY shade sail project is one of the most satisfying outdoor improvements a homeowner can make. It is affordable, achievable, and transformative. Done right — with proper materials, correct installation, thoughtful styling, and consistent maintenance — a DIY sail looks every bit as good as a professional installation. Your backyard deserves shade. You are more capable of creating it than you might think.
Conclusion
A backyard without shade is a backyard you do not use. But with the right sun shade sail design — whether it is a sleek modern canopy, a creative zone-based layout, a geometric triangle, a sculptural layered installation, or a budget-friendly DIY build — your outdoor space becomes somewhere you actually want to spend time. Real time. Meaningful time.
The five ideas in this guide all work. They are proven, practical, and beautiful. The one that is right for you depends on your space, your budget, and the life you want to live outside. Choose the design that feels like yours, gather your materials, and start building. Your perfect backyard summer is closer than you think — it is just waiting for a little shade.

“I share simple, beautiful and affordable home decor ideas to help you style every corner of your home with ease.