

There’s something magical about walking into a home where the kitchen doesn’t feel like a separate box tucked away from life. You know that feeling—when cooking dinner doesn’t mean missing the conversation in the living room, when meal prep flows naturally into family time, when your entire first floor breathes as one cohesive space. That’s the promise of an open kitchen, but here’s the truth: most open renovations fail not because of poor design choices, but because they prioritize aesthetics over actual living. You end up with a beautiful kitchen that echoes like a cafeteria, traffic jams around the island, and cooking smells that invade your couch.
The best open kitchen renovations in 2026 aren’t about tearing down every wall and calling it modern. They’re about creating intentional zones that work together, managing sound and light like the game-changers they are, and building storage that keeps visual chaos at bay. Whether you’re planning a full gut renovation or a strategic refresh, the difference between an open kitchen that impresses guests and one that serves your actual life comes down to understanding flow, function, and the small decisions that nobody talks about. Let’s break down exactly what works, what doesn’t, and how to create an open kitchen that feels like the heart of your home—not just another Pinterest fail.
Open Kitchen Renovation Ideas For Modern Homes 2026
Open kitchens in 2026 aren’t about showing off every appliance and utensil you own. They’re about creating purposeful, calm spaces that enhance your entire living area rather than dominating it. The modern approach focuses on strategic visibility—choosing what to display and what to conceal based on both function and aesthetics.
Start with One Strong Visual Line
Your open kitchen needs a visual anchor that draws the eye without blocking movement.
- Use continuous cabinetry along one wall to create rhythm and flow
- Position your island parallel to main sightlines from the entrance
- Keep countertops clear by planning dedicated landing zones
- Avoid visual barriers that chop up the space between kitchen and living areas
The strongest designs follow a single dominant horizontal line that unifies the space. This could be your island length, your upper cabinet line, or even your backsplash edge.
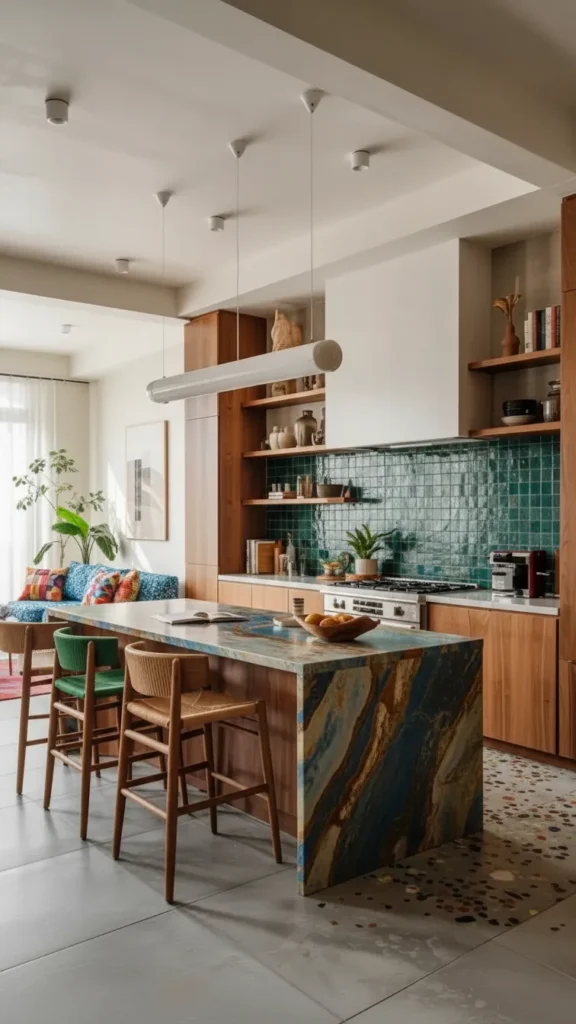
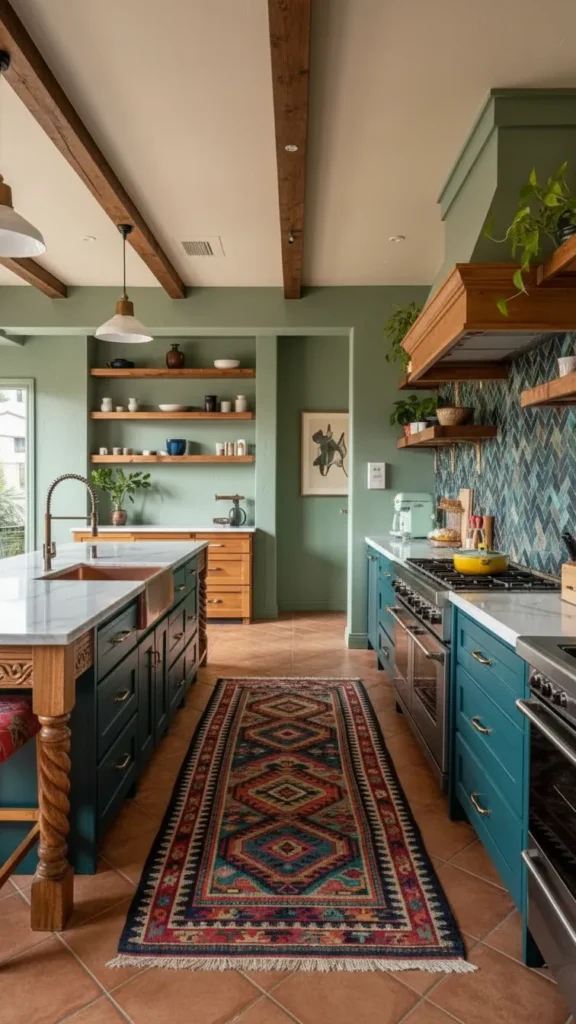
Balance Smooth and Textured Surfaces
All-sleek surfaces make open kitchens feel cold and institutional when they flow into living spaces.
- Mix materials thoughtfully: smooth cabinets with textured stone or wood accents
- Add warmth through wood tones in stools, shelving, or island bases
- Choose matte or low-glare finishes to prevent light reflection into living areas
- Layer in fabric and soft elements at the dining end to absorb sound
Pin this material mixing strategy! 📌
Control What’s Visible from the Entrance
First impressions matter intensely in open layouts because everything is exposed.
- Plan the primary view angle from your main entrance or hallway
- Hide small appliances in appliance garages or tall pantry units
- Keep one section pristine even if other areas get messy during cooking
- Use closed storage closest to living room edges
Consider walking through your current space and noting what catches your eye first. That’s your priority zone for visual calm.
Create Functional Open Shelving (Not Decorative Chaos)
Open shelves can work beautifully, but only when they serve a real purpose.
- Limit open shelving to one short run, not wall-to-wall coverage
- Display daily dishes you actually use, not decorative items collecting dust
- Keep it edited: 60% full maximum for a clean look
- Combine with closed cabinets for a balanced, functional approach
If you wouldn’t reach for it during a normal week, it doesn’t belong on open shelves in an open kitchen.
Invest in Quiet, Integrated Ventilation
Sound control makes or breaks open kitchen comfort. Your hood is critical.
- Choose high-CFM models with low sone ratings (3.0 or less)
- Install ducted systems whenever possible—they’re quieter than recirculating
- Size appropriately: hoods should extend 3-6 inches beyond cooktop edges
- Consider downdraft vents for islands if overhead ducting isn’t feasible
The cooking smells and noise that go directly into your living room will make you regret skimping here.
Plan Lighting in Distinct Layers
Single overhead lights create harsh shadows and fail to define zones in open spaces.
- Task lighting: LED strips under cabinets, pendants over islands
- Ambient lighting: recessed cans on dimmers for overall illumination
- Accent lighting: dining fixture to anchor the eating area visually
- Natural light management: consider how sunlight moves through the space
Different zones need different light levels. Your prep area should be bright; your dining and living areas softer.
Save this lighting layering approach! 📌

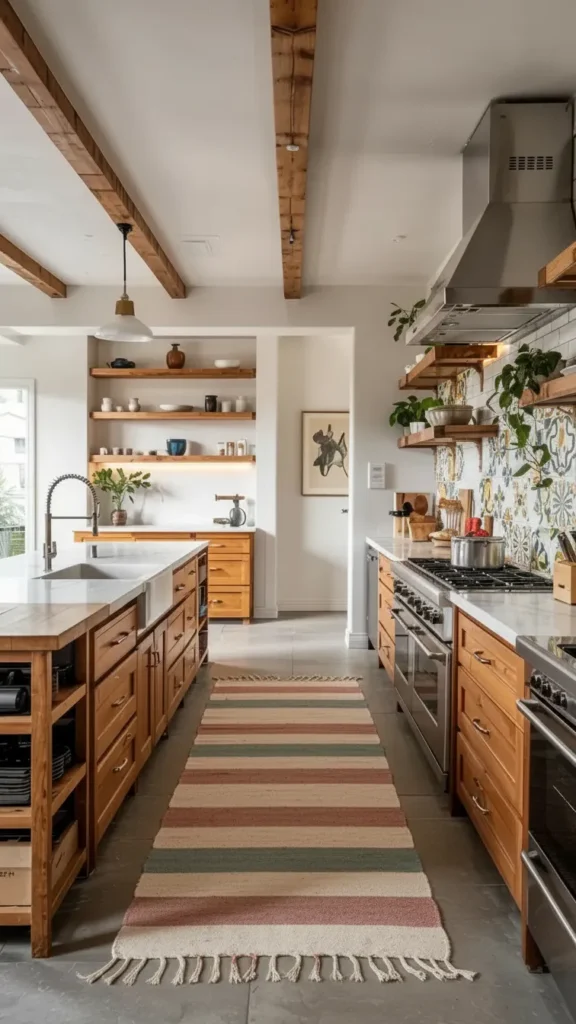
Repeat Materials Across Zones
Visual unity comes from thoughtful repetition, not matching everything exactly.
- Echo wood tones from living room furniture in kitchen stools or shelving
- Match metal finishes across faucets, cabinet pulls, and light fixtures
- Coordinate (don’t match) paint colors between kitchen and adjacent spaces
- Use the same flooring throughout to expand visual space
This creates rhythm without feeling overly coordinated or staged.
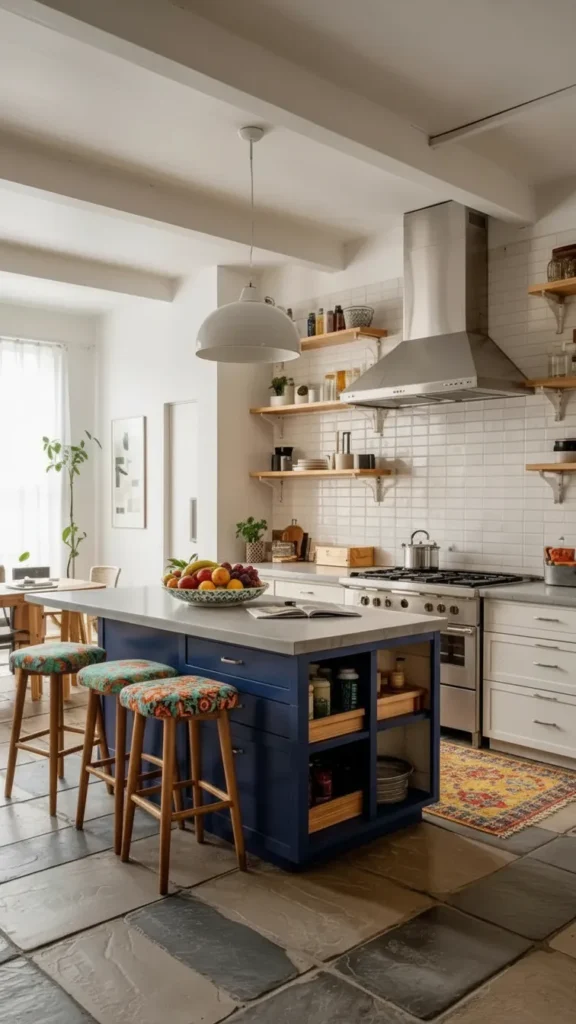
Minimize Island Clutter
Your island is prime real estate in an open kitchen—don’t let it become a junk collector.
- Build in strategic storage: deep drawers, not shelves that show contents
- Create drop zones elsewhere for mail, keys, and daily items
- Limit countertop appliances to absolute essentials
- Choose one statement piece: a textured backsplash or sculptural pendant
The fastest way to make an open kitchen feel messy is a cluttered island that’s visible from every angle.
Design with Sightlines and Landing Zones
Before choosing finishes, map out how you actually move through the space.
- Track where bags and groceries enter and build storage there
- Measure walkways: minimum 42 inches around islands, 48 inches preferred
- Test door swings for refrigerators, dishwashers, and cabinets
- Plan clear paths from kitchen to dining to living areas
Use painter’s tape on the floor to mock up these zones before committing to a layout.
Decide What to Show and What to Hide
Modern design is about curation—choosing what deserves visual attention.
- Hide: small appliances, cleaning supplies, cookware, food packaging
- Show: selected dishes, 2-3 decorative objects, fresh items in beautiful bowls
- Conceal: trash, recycling, and composting in pull-out units
- Display: architectural elements like a beautiful range or statement hood
The discipline of editing makes open kitchens feel intentional rather than chaotic.
The most successful modern open kitchens create the illusion of effortless style while hiding the functional reality of busy kitchen work. Every design choice should answer one question: does this help me live better, or does it just look good in photos?
Open Kitchen Renovation Tips For Better Flow And Function
Flow isn’t about aesthetics—it’s about whether your kitchen frustrates you or supports you every single day. In open layouts, poor flow affects not just cooking efficiency but your entire living space experience. Getting this right requires thinking about movement patterns before you think about cabinet colors.
Map Primary and Secondary Pathways
People will cross your kitchen to reach other parts of your home. Plan for it.
- Identify main traffic routes from entrance to living room to bedrooms
- Keep primary paths clear of hot zones (range, oven) and wet zones (sink)
- Design the work triangle (sink-stove-fridge) to be compact but not in main walkways
- Create alternative routes so someone can get a drink without entering the prep workspace
Draw these paths on your floor plan. You’ll immediately see where conflicts exist.
Build in a Secondary Circulation Path
The classic work triangle fails in open kitchens because it ignores other household members.
- Plan a beverage station away from main prep areas
- Position the refrigerator accessible from dining areas without kitchen entry
- Create a snack drawer that opens toward living spaces
- Design around the cook so others can function independently
Pin this dual-pathway planning method! 📌

Optimize the Work Triangle Dimensions
Even with open layouts, the cooking zone needs smart proportions.
- Keep triangle legs between 4-9 feet each for efficiency
- Total triangle perimeter: ideally 13-26 feet
- Avoid traffic cutting through the triangle during meal prep
- Place trash and compost within the triangle, near prep areas
Too small feels cramped; too large means excessive walking during cooking.
Design Deep Drawers for Real Cookware
Shallow drawers look nice but fail at storing actual kitchen tools.
- Install 10-12 inch deep drawers for pots, pans, and large bowls
- Use peg systems or adjustable dividers to organize contents
- Position near the range for easy access during cooking
- Skip lower cabinets with shelves—drawers provide better access and storage
Drawers cost more upfront but dramatically improve daily function.
Position Trash and Recycling Strategically
Waste management location impacts how often you walk and how clean counters stay.
- Install pull-out trash in the cabinet next to your main prep area
- Include recycling and compost in the same unit if space allows
- Choose models with soft-close to reduce noise in open spaces
- Avoid corner locations—they’re inconvenient during busy cooking
You touch trash containers dozens of times daily. Make the location intuitive.
Create Closed Storage Near Living Room Edges
The parts of your kitchen closest to living areas need the most discipline.
- Use solid cabinet doors rather than glass or open shelving
- Keep this zone clutter-free even when the cooking zone is messy
- Store entertaining items here: serving pieces, nice glassware
- Make it beautiful since it’s always visible
This creates a visual buffer between working kitchen and relaxation space.
Save this storage zoning strategy! 📌
Choose Backed Stools for Island Seating
If your island serves as primary eating space, comfort matters enormously.
- Stools with backs keep people seated longer for meals and conversation
- Allow 24-28 inches width per person at the island
- Provide 9-13 inches of knee space between stool seat and counter
- Choose styles that tuck under completely to maintain walking clearance
Backless stools look minimalist but cause people to migrate to the couch mid-meal.
Plan Outlets and Charging Points Early
Modern life means devices everywhere—anticipate this in your open layout.
- Install outlets every 4 feet along countertop runs
- Add floor outlets for island or peninsula locations
- Include USB ports in high-use areas like breakfast bars
- Place outlets 4 inches above countertop height (not higher)
Running extension cords across open spaces destroys the clean aesthetic you’ve worked to create.
Test Your Layout with Painter’s Tape
Before you commit to any renovation, mock it up physically.
- Tape out island dimensions and door swing clearances on the floor
- Walk through repeatedly with your typical morning and evening routines
- Test with two people moving through simultaneously
- Adjust before construction begins—moving tape is free, moving cabinets isn’t
You’ll discover friction points on paper that would frustrate you for years.
Select Quiet Appliances and Powerful Hoods
Sound and smell travel unobstructed in open layouts, making these choices critical.
- Check dishwasher decibel ratings: 44 dB or lower is ideal
- Choose high-CFM hoods: minimum 300 CFM, 600+ for serious cooking
- Install sound-dampening pads under garbage disposals
- Consider panel-ready appliances that blend visually while performing quietly
These functional choices matter more than any decorative decision in determining daily comfort.
The best open kitchen flow comes from obsessing over your actual routines—not copying beautiful photos that show spaces nobody really lives in. Function first, then make it beautiful.
Open Kitchen Renovation Before After Transformations
The most impressive before-and-after renovations solve actual problems rather than just updating finishes. When I look at transformation photos, I’m searching for evidence of improved functionality—better traffic flow, smarter storage, enhanced lighting—not just prettier countertops. Real transformation changes how you experience your entire home.
Identify the Core Problems First
Before touching finishes, diagnose what’s actually broken about your current layout.
- Document frustration points: where do traffic jams happen, where does clutter accumulate
- Photograph from multiple angles showing real daily conditions, not staged
- List functional failures: insufficient storage, poor lighting, awkward circulation
- Note what works well so you don’t accidentally eliminate good features
Honest problem identification prevents cosmetic renovations that look better but function worse.
Remove Walls Strategically, Not Automatically
Opening up spaces works only when it improves flow and sightlines.
- Remove partial walls that block views but don’t support structure
- Consult engineers before touching any wall—some are load-bearing
- Consider half-walls or peninsulas for partial openness with defined zones
- Keep short wall sections where they provide useful backing for furniture
Not every wall removal improves the space. Sometimes partial barriers enhance function.
Pin this strategic wall removal approach! 📌
Replace Scattered Cabinets with Unified Storage
Before renovations often show upper cabinets scattered across multiple walls creating visual chaos.
- Consolidate into one pantry wall with floor-to-ceiling storage
- Eliminate upper cabinets on walls facing living areas
- Use lower cabinets and islands for primary storage
- Add one controlled open shelving section maximum for visual interest
This transformation immediately makes spaces feel larger and calmer.
Transform Isolated Kitchens into Connected Spaces
The classic before: kitchen tucked away in a separate room, disconnected from life happening elsewhere.
- Open sightlines to living areas so cooks aren’t isolated
- Create conversational seating at islands or peninsulas
- Align kitchen views with focal points like fireplaces or windows
- Maintain distinct zones even within open plans
The after should feel like one expanded space, not one giant room.
Upgrade Lighting from Single Source to Layered System
Before renovations typically show one overhead light creating harsh shadows and dim corners.
- Add recessed task lighting over work zones
- Install pendant lights over islands for both function and focal interest
- Include dining fixture to anchor eating area
- Use dimmers throughout to adjust ambiance by time and activity
This lighting transformation dramatically impacts mood and functionality.
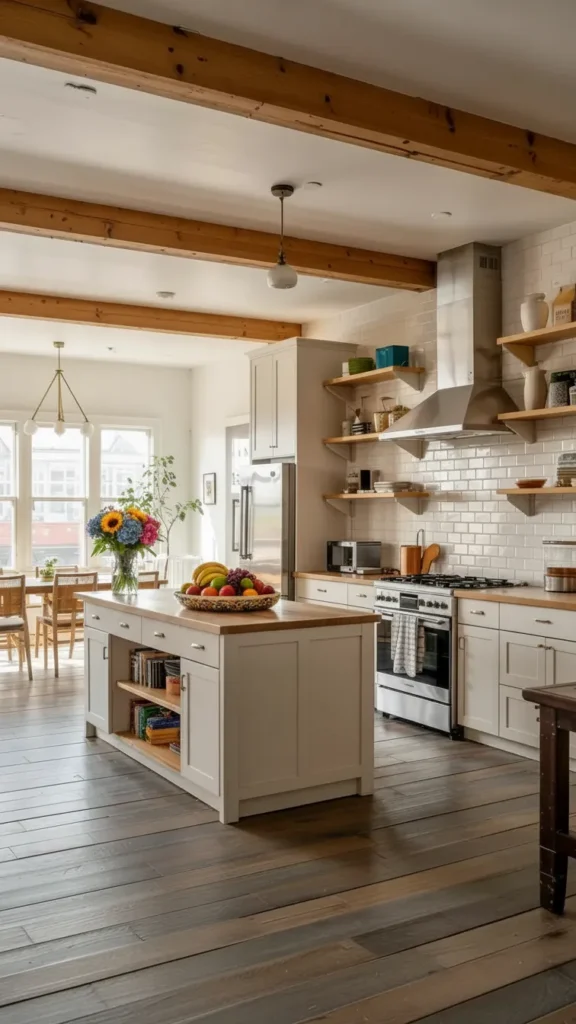
Unify Flooring Across Kitchen and Living Areas
Different flooring in adjacent open spaces visually chops up the layout.
- Extend single flooring material throughout kitchen, dining, and living zones
- Choose durable materials: luxury vinyl, engineered hardwood, or large-format tile
- Consider radiant heating during renovation for added comfort
- Run planks lengthwise along longest sightlines to enhance space perception
Continuous flooring is one of the highest-impact, most affordable transformations.
Save this flooring unification strategy! 📌
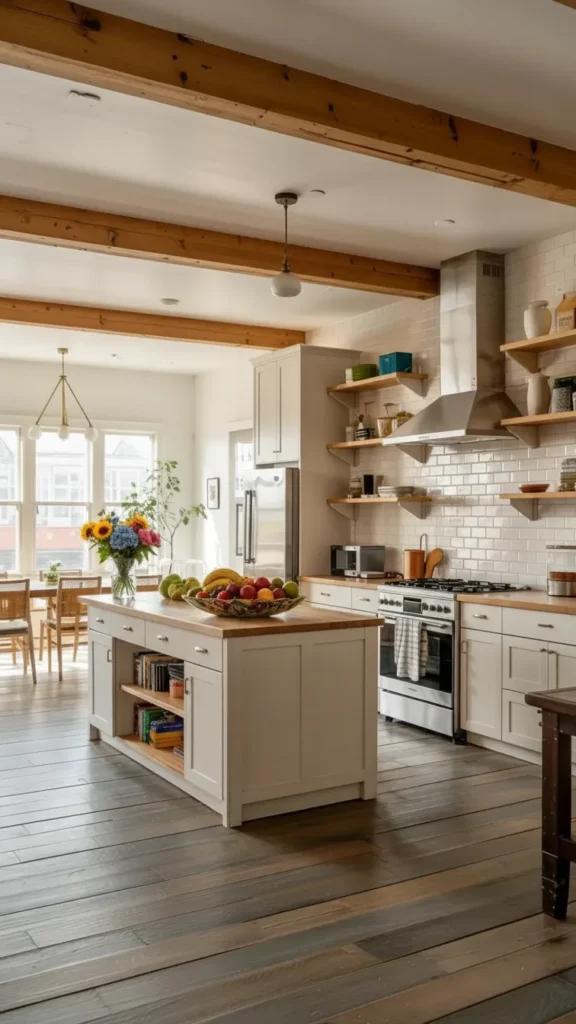
Add Islands That Function Beyond Prep
Before layouts often lack any central gathering point or additional prep space.
- Design islands as multi-purpose: prep, dining, homework, entertaining
- Include seating for 2-4 people depending on space
- Build in storage: deep drawers, wine racks, bookshelf ends
- Size appropriately: allow 42-48 inches clearance on all sides
The island becomes the heart of open layouts when designed with multiple functions.
Conceal Visual Clutter with Appliance Integration
Before photos often show mismatched appliances and exposed clutter creating visual noise.
- Choose panel-ready appliances that blend with cabinetry
- Create appliance garages for toasters, coffee makers, mixers
- Build in coffee stations with dedicated outlets and storage
- Hide trash and recycling in pull-out cabinets
Reducing visual clutter makes open spaces feel exponentially more peaceful.
Capture Your Honest Before State
Most people only photograph their space when it’s staged for sale or cleaned for guests.
- Document typical daily mess to understand real storage needs
- Measure all clearances including door swings and walkways
- Write down specific frustrations while you still experience them daily
- Note what you use versus what just takes space for storage planning
This honesty makes after transformations genuinely better, not just prettier.
Plan a Temporary Kitchen During Construction
Open renovations affect your entire living space, not just the kitchen.
- Set up microwave, toaster oven, and coffee maker in another room
- Use coolers for refrigeration or rent a mini-fridge
- Establish paper goods and simple meals for the duration
- Protect living areas with plastic sheeting—dust travels everywhere
Planning for this minimizes renovation stress and keeps your household functioning.
The most satisfying before-after transformations address real living challenges. You should be able to point to specific improvements: “now we can talk while cooking,” “traffic doesn’t block the sink anymore,” “we actually use the dining area now.” That’s genuine transformation.
Open Concept Kitchen Renovation Planning Essentials
Planning an open concept renovation requires thinking beyond the kitchen itself because every decision impacts connected living and dining spaces. This isn’t a single-room project—it’s a whole-floor living transformation that touches structure, systems, utilities, and daily routines. Comprehensive planning prevents expensive surprises and disappointing results.
Start with Structural Assessment, Not Finishes
Before you fall in love with cabinet styles, understand what’s structurally possible.
- Hire a structural engineer if removing any walls
- Identify load-bearing elements that must remain or be replaced with beams
- Check ceiling heights and beam locations for hood ducting
- Assess floor joists if adding heavy materials like stone
Structural work takes weeks and costs thousands. Know this before choosing countertops.
Define Distinct Zones Within Open Space
Open doesn’t mean undifferentiated—successful plans create clear functional areas.
- Cooking zone: range, prep sink, main storage
- Cleanup zone: main sink, dishwasher, trash
- Dining zone: table or island seating with dedicated lighting
- Living zone: furniture arranged for conversation and relaxation
Each zone needs dedicated planning for lighting, storage, and circulation.
Pin this zone definition framework! 📌
Plan Utilities Early in Design Process
Mechanical, electrical, and plumbing (MEP) systems constrain layouts more than aesthetics do.
- Hood ducting paths: straight runs work best, minimize elbows
- Electrical load: open kitchens often need service panel upgrades
- Plumbing routes: moving sink or dishwasher locations costs significantly
- HVAC registers: ensure heating/cooling reaches all zones effectively
These boring technical decisions determine what layouts are actually feasible.
Design Comprehensive Storage Solution
Open kitchens show everything, so inadequate storage becomes immediately obvious.
- Calculate linear footage needed based on current possessions plus 20%
- Prioritize deep drawers over shelved cabinets for accessibility
- Include tall pantry units for bulk items and small appliances
- Plan landing zones for bags, keys, mail, and everyday items
Undersized storage is the number one complaint in completed open kitchen renovations.
Layer Lighting for All Activities and Times
Single overhead lighting fails in open concept spaces with varied functions.
- Task lighting: 50 foot-candles for food prep areas
- Ambient lighting: 20-30 foot-candles for general circulation
- Accent lighting: 10-15 foot-candles for dining and living zones
- Natural light: consider how windows affect space throughout the day
Use dimmers everywhere to adjust lighting for morning coffee, meal prep, and evening entertaining.
Address Sound Management Proactively
Open plans amplify every sound—plan for acoustic control from the start.
- Choose quiet appliances: dishwashers under 45 dB, powerful but quiet hoods
- Add soft surfaces in living areas: rugs, upholstered furniture, curtains
- Install sound-dampening pads under garbage disposals and other mechanical equipment
- Consider acoustic ceiling panels in large open spaces
Sound carries farther in open layouts. Design to minimize echoing and noise transfer.
Save this sound management checklist! 📌
Scale Elements Proportionally to Space
Imbalanced scale is a common planning failure in open renovations.
- Island size: shouldn’t dominate the kitchen or impede traffic
- Seating capacity: should match your actual entertaining style
- Cabinet heights: floor-to-ceiling in small spaces, varied heights in large
- Fixture scale: pendants and chandeliers sized appropriately for ceiling height
Walk through spaces with similar dimensions to understand how sizes feel in reality.
Plan for Visual Cohesion Across Zones
Open spaces require more coordination than separate rooms.
- Limit color palette: 3-4 colors maximum across all connected spaces
- Coordinate materials: wood tones, metal finishes, stone colors
- Repeat elements: carry one material from kitchen into living area
- Consider sightlines: what’s visible from each vantage point
Visual chaos happens when each zone is designed independently.
Create Storage Inventory Before Design
Vague storage estimates lead to insufficient space and cluttered counters.
- List everything needing storage: dishes, cookware, appliances, pantry goods, cleaning supplies
- Measure large items: stand mixers, stock pots, serving platters
- Note frequency of use: daily items versus occasional pieces
- Plan for growth: babies become kids, hobbies expand, households change
Accurate inventory ensures you build enough storage in the right locations.
Test Layout with Multiple Scenarios
Static floor plans don’t reveal how spaces actually function.
- Mock up with furniture: use cardboard boxes to represent island, cabinets
- Walk through repeatedly: simulate cooking dinner, cleaning up, hosting guests
- Test with family members: can two people work simultaneously
- Adjust before finalizing: moving tape and boxes is free, reconstruction isn’t
Physical testing reveals problems that floor plans hide.
Planning open concept renovations requires patience to work through technical requirements before aesthetic desires. The most beautiful spaces fail if utilities are inadequate, storage is insufficient, or traffic flow frustrates daily life. Function first, beauty second, but achieve both.
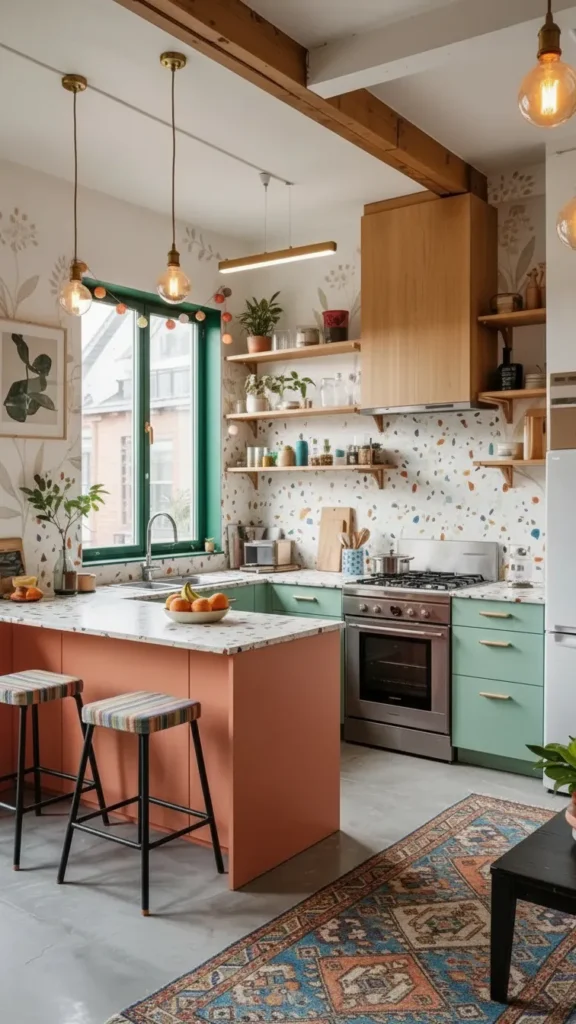
Small Open Concept Kitchen Renovation Solutions
Small open concept kitchens present a unique challenge: you need the efficiency of compact design plus the visual calm of open spaces, but you have less room to hide messes and fewer square feet for storage. Success requires ruthless editing, smart storage solutions, and design choices that visually expand space without sacrificing function.
Maximize Vertical Storage to Ceiling Height
When floor space is limited, use every inch of vertical space.
- Floor-to-ceiling cabinets provide dramatically more storage than standard height
- Use the top shelf for rarely-needed items: holiday dishes, specialty cookware
- Install a step stool that slides into a narrow cabinet for access
- Choose vertical pull-outs instead of deep cabinets you can’t reach into
Vertical storage gives you the capacity of a larger kitchen within a small footprint.
Prioritize Drawers Over Cabinets
Deep drawers store more and provide easier access in compact spaces.
- Convert lower cabinet space to full-extension drawer systems
- Use drawer dividers to maximize organization and prevent jumbled contents
- Install pull-out drawers even in upper cabinets for better access
- Size drawers appropriately: 10-12 inches deep for cookware, 3-5 inches for utensils
Drawers cost 20-30% more than cabinets but dramatically improve small kitchen function.
Pin this drawer-first storage approach! 📌
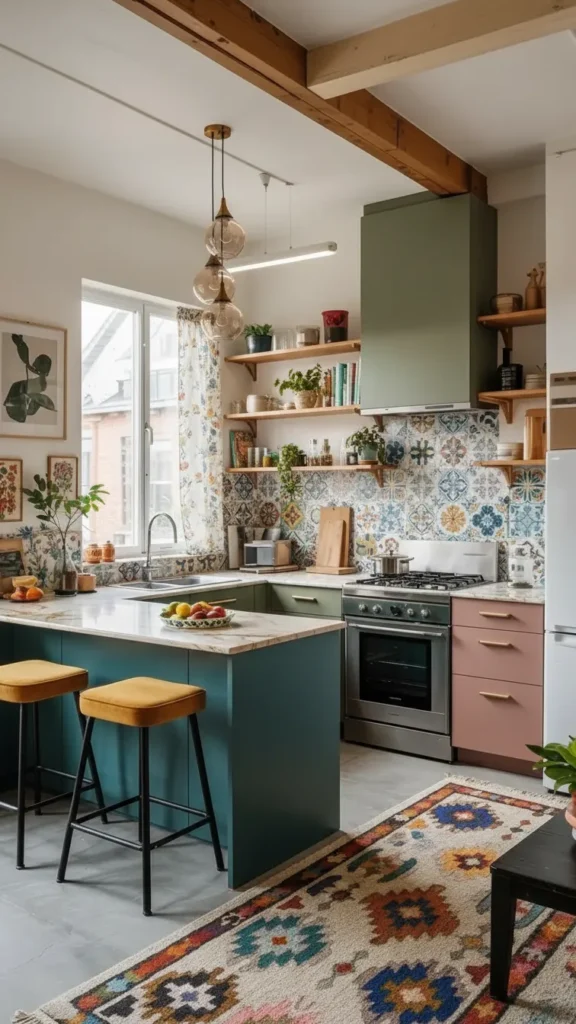
Design a Compact, Functional Island
Small spaces need islands that justify their footprint through multi-functionality.
- Minimum dimensions: 24 inches deep by 48 inches long
- Include storage underneath: shelves, wine racks, or drawer banks
- Add seating for two with overhang on one side
- Ensure 42-inch clearance minimum on all sides for traffic flow
An island that blocks traffic or provides minimal function wastes precious space.
Use Single Open Shelving Run Sparingly
Open shelving can visually expand small spaces but quickly becomes cluttered.
- Limit to one 36-48 inch section maximum
- Keep it lightly styled: 60% full maximum
- Display only daily-use items in cohesive colors
- Combine with closed cabinets for balance and hidden storage
Too much open shelving makes small spaces feel chaotic rather than spacious.
Choose Integrated Appliances for Visual Calm
Appliances that blend with cabinetry reduce visual clutter in small open spaces.
- Panel-ready refrigerators disappear into cabinet runs
- Integrated dishwashers maintain clean lines
- Built-in coffee makers eliminate countertop clutter
- Microwave drawers preserve upper cabinet space
Cohesive cabinet faces make small kitchens recede visually into living areas.
Install Slim Islands or Peninsulas
When a full island won’t fit, consider narrow alternatives.
- Peninsula attached to wall provides seating and storage without full island clearance
- Narrow islands: 20-22 inches deep still function for prep
- Mobile carts on locking casters provide flexibility
- Fold-down extensions expand surface when needed, retract when not
These solutions provide island benefits without overwhelming small spaces.
Save this compact island strategy! 📌
Maintain Consistent Flooring Throughout
In small spaces, continuous flooring is even more critical for visual expansion.
- Eliminate transitions between kitchen, dining, and living zones
- Choose light colors to brighten and expand perception
- Run planks along longest sightline to enhance length
- Use large-format materials: 12×24-inch tile or wide-plank flooring
Visual interruptions make small spaces feel even smaller.
Create a Compact Work Triangle
Small kitchens need especially efficient layouts with minimal steps.
- Keep triangle legs 4-6 feet each, no longer
- Position sink centrally between range and refriger ator
- Use corner space for diagonal sink or range placement
- Minimize traffic through the work zone
Tight triangles improve efficiency; overly compact triangles feel cramped. Find the balance.
Design Strategic Landing Zones
Countertop space is premium real estate in small open kitchens.
- Create one dedicated landing zone for mail, keys, phones
- Build in charging station to corral device clutter
- Use drawer organizers instead of countertop containers
- Install appliance garage for toaster, coffee maker, blender
Clear counters make small kitchens feel significantly more spacious.
Choose Slim, Tuckable Stools
Seating must completely clear pathways in small layouts.
- Backless stools tuck fully under counters
- Width: 16-18 inches each, narrower than standard 24 inches
- Low-profile designs don’t visually clutter space when not in use
- Consider folding options that store completely away
Oversized stools create daily traffic frustration in compact spaces.
Small open concept kitchens succeed when every design choice earns its place through function, storage, or visual expansion. There’s no room for purely decorative elements or inefficient layouts. Edit ruthlessly, plan storage precisely, and choose compact, multi-functional solutions. The discipline required for small spaces often creates the most satisfying, efficient kitchens.
Conclusion
Open kitchen renovations aren’t just about aesthetics—they’re about creating spaces that genuinely improve how you live, cook, and connect with the people in your home. The difference between a renovation you love and one that frustrates you daily comes down to intentional planning around flow, function, and the honest reality of your routines. When you prioritize movement patterns over magazine-perfect styling, when you invest in quiet appliances and powerful ventilation, when you build storage that handles actual clutter rather than ideal minimalism, you create a kitchen that works for real life.
The best open kitchens in 2026 balance openness with intentional zones, visibility with strategic concealment, and contemporary style with timeless functionality. Whether you’re working with a sprawling layout or a compact footprint, the principles remain the same: edit ruthlessly, plan storage precisely, layer your lighting, and test your layout before committing. Your open kitchen should feel like the natural heart of your home—a space that supports cooking, gathering, homework, and conversation without the echoing chaos or visual clutter that plagues poorly planned renovations. Take the time to plan thoughtfully, and you’ll create a transformation that serves you beautifully for decades.

“I share simple, beautiful and affordable home decor ideas to help you style every corner of your home with ease.