
There is something almost magical about stepping outside your back door and feeling like you have left the world behind. You do not have to drive hours to a mountain retreat or book a cabin months in advance. In 2026, your own backyard can become the most luxurious escape you have ever experienced — if you know how to set it up right.
Whether you are planning a romantic evening under the stars, a birthday bash your friends will talk about for years, or simply a peaceful weekend away from your phone, glamping at home is the answer. This guide gives you five powerful, practical ideas to transform any outdoor space — big or small — into a boutique retreat you are genuinely proud of.
The Luxury Tent Setup – Creating Your Centerpiece
A well-designed tent is not just a shelter. It is the heart of your entire backyard glamping experience. Get this right and everything else falls into place naturally.
Choose the Right Tent Shape for Your Space
The tent you choose sets the visual tone before anyone even steps inside.
- Bell tents (12–16 ft diameter) work beautifully in larger yards. Their tall center pole creates dramatic height and a sense of occasion.
- Dome tents are ideal for compact patios or side yards. They feel cozy and proportional in tighter spaces.
- A-frame canvas tents offer a modern, editorial look that photographs exceptionally well.
Always position the tent entrance to face your most attractive garden view — a flower bed, a tree line, or a water feature. This simple placement decision changes the entire atmosphere.
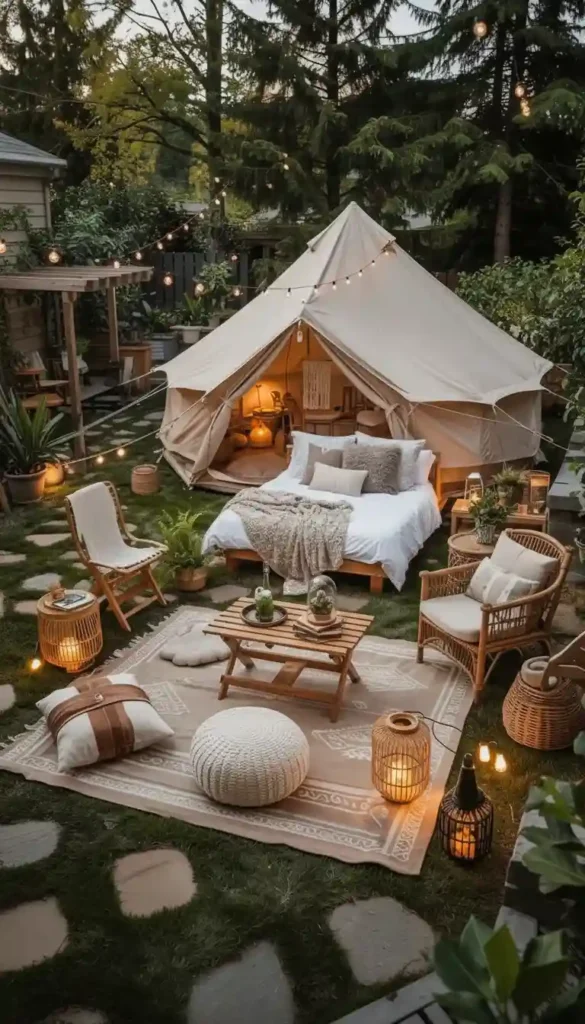
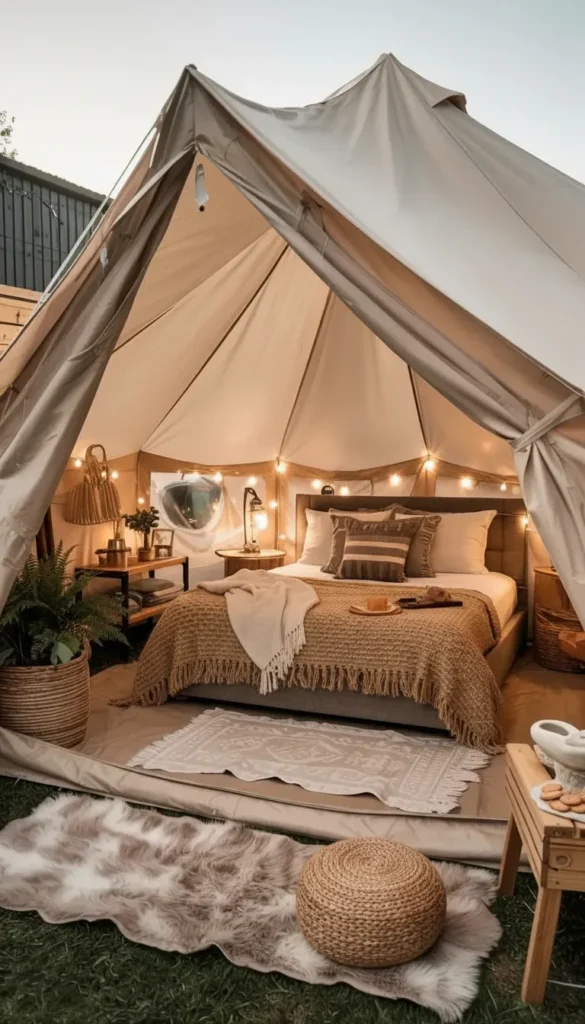
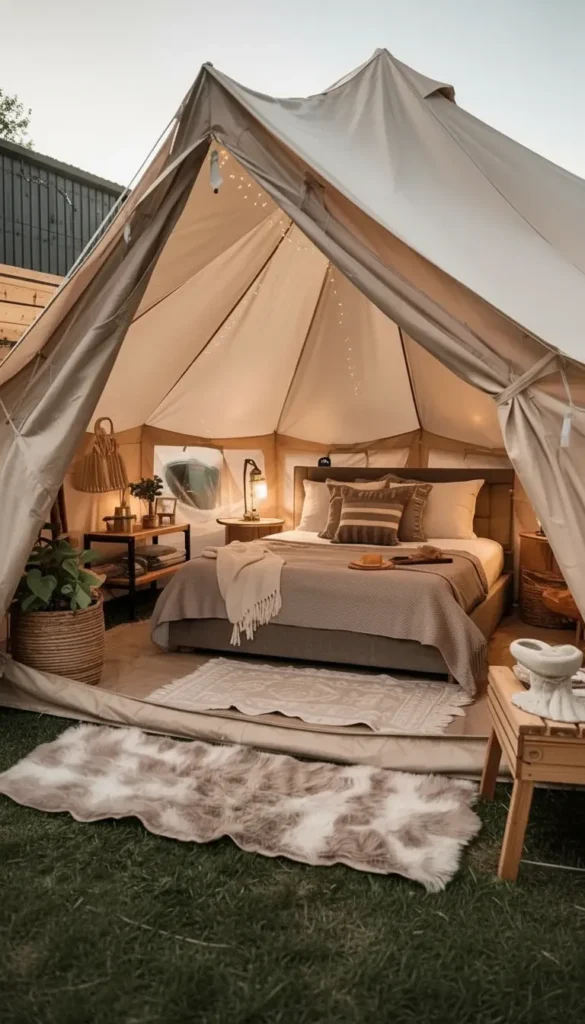
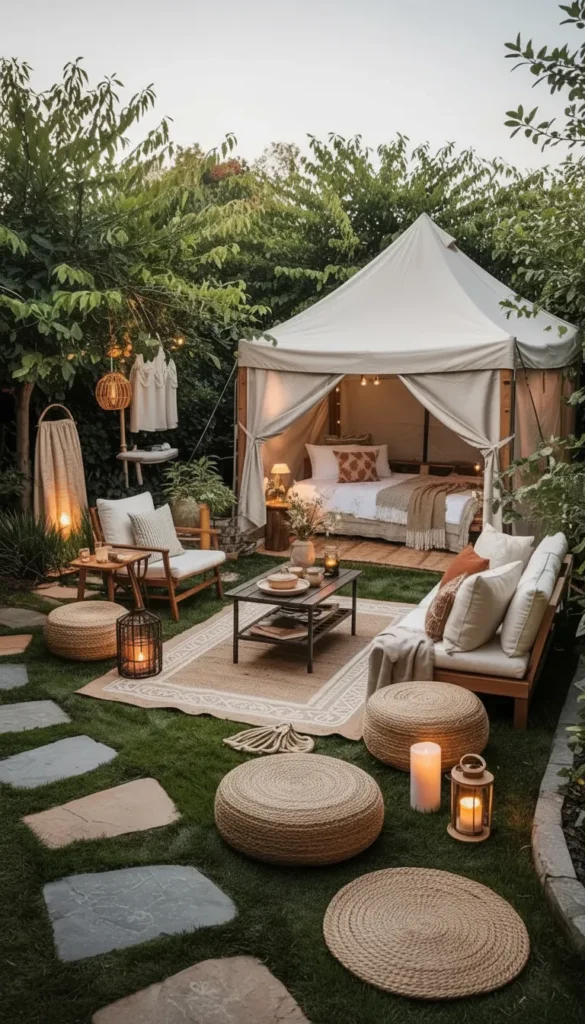
Build a Layered Interior That Feels Intentional
The inside of your tent should feel like a boutique hotel room, not a camping trip.
- Start with a low platform bed or a raised air mattress on wooden pallets. Keep it at least 6–8 inches off the ground for comfort and style.
- Layer your bedding: crisp white linen on the bottom, a chunky knit throw on top, and at least four oversized pillows.
- Place an area rug (jute or wool works perfectly) beneath the bed to ground the space and add warmth.
- Add a folding wooden side table — it holds a candle, a carafe of water, and a book without crowding the floor.
Why it works: Layering creates visual depth. A flat, minimal setup looks like camping. A layered setup looks like a destination.
📌 Pin this luxury tent setup! 📌
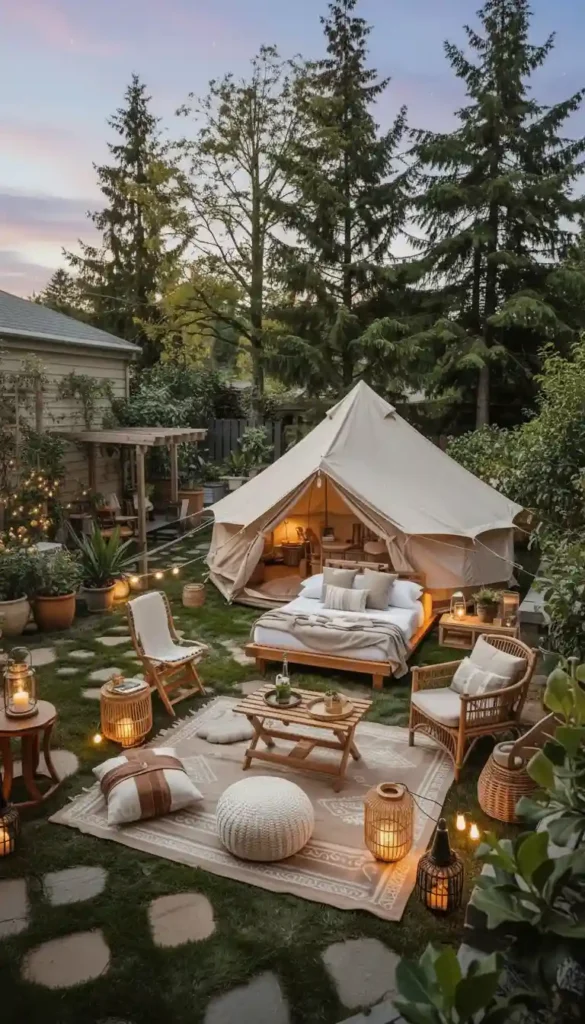
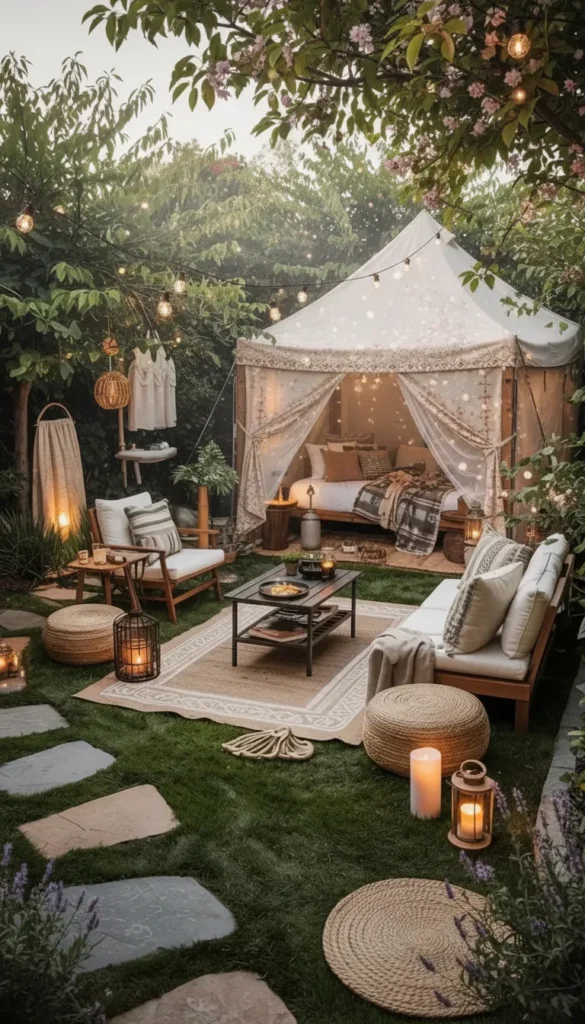
Add Lighting That Does the Heavy Lifting
Lighting is the single most transformative element in any glamping setup.
- String Edison bulb fairy lights across the tent ceiling in a loose canopy pattern.
- Use lantern-style table lamps (battery-powered or solar) near the bed and at the entrance.
- Avoid cool white or blue-toned bulbs. Warm amber light (2200–2700K) creates an immediate sense of calm and luxury.
- Add a few pillar candles in hurricane glass holders for layers of flickering warmth.
The goal is to eliminate the feeling of being outside and replace it with the feeling of being somewhere special.
Use Texture and Scent to Elevate the Sensory Experience
Designers and stylists across major home publications consistently point to texture as the secret ingredient in memorable spaces.
- Woven wall hangings or macramé accents on the tent canvas add visual softness.
- Sheer curtain panels hung at the entrance create privacy without blocking airflow.
- A small ceramic diffuser or lavender sachets tucked near the pillows make the interior smell as good as it looks.
- Insulated flooring panels placed beneath your rug add comfort underfoot and reduce sound from the ground.
Small details like ceramic drinkware (instead of plastic cups) and linen napkins signal to every guest that this experience was thoughtfully designed.
Practical Tips for Weather and Safety
Even the most beautiful setup needs to handle real-world conditions.
- Stake your tent securely. Bell tents should be anchored with at least 6–8 ground stakes plus guy ropes.
- Add a weather-resistant canopy or pergola just outside the tent entrance for shade during the day and rain protection in the evening.
- Use only fire-resistant fabrics for curtains, rugs, and throws near candles or fire features.
- Keep a backup power bank and battery-powered lantern ready in case of wind or power issues.
📌 Save this tent styling strategy! 📌
A well-anchored, beautifully lit tent with layered textures is your most important investment. Everything else is built around it.
The Backyard Glamping Party Setup – From Intimate to Full Celebration
Glamping is not just a solo retreat experience. With the right planning, your backyard can host the most memorable party of the season — with all the comfort of a high-end outdoor venue.
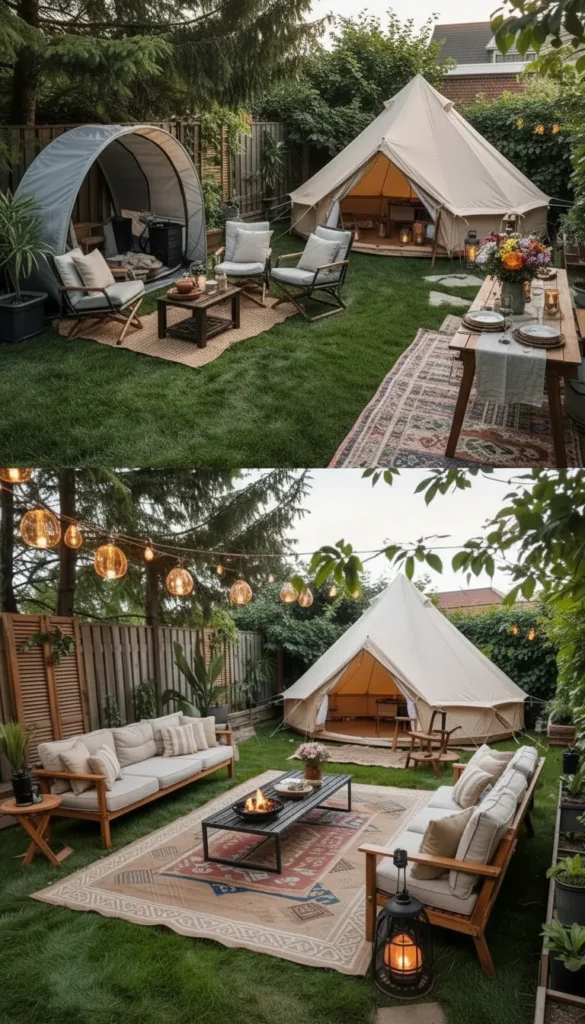
Define Your Zones Before You Decorate
The biggest mistake at backyard parties is placing everything without a plan. Spatial organization determines how guests move, mingle, and feel.
- Create three distinct zones: sleeping/lounge, dining, and entertainment.
- Use outdoor rugs to anchor each zone visually. A rug says “this area has a purpose.”
- Leave clear pathways (at least 36 inches wide) between zones so guests can move freely.
- Position the drink station between the lounge and dining areas so it serves both naturally.
Think of your backyard like a floor plan. Guests should be able to read the space immediately without needing directions.
Build a String Light Canopy for Instant Atmosphere
String lights are the fastest way to transform any outdoor space from ordinary to extraordinary.
- Suspend lights between wooden poles, fence posts, or tree branches in a crisscross grid pattern.
- Hang them at approximately 8–10 feet high to create a ceiling effect without interfering with movement.
- Use warm-white Edison bulbs on a dimmer switch for flexible ambiance throughout the evening.
- Layer with paper lanterns or rattan ball lights at different heights for visual depth.
📌 Pin this party lighting approach! 📌

This overhead light canopy works as both decoration and functional lighting. Guests will instinctively gravitate toward the warmth it creates.
Set Up a Drink Station That Doubles as Décor
A well-styled drink station is one of the most appreciated details at any glamping party.
- Use a wooden bar cart or a repurposed vintage table as your base.
- Display bottles, decanters, and glassware at varying heights using wooden crates or stacked books.
- Add a self-serve infused water station (cucumber mint, citrus berry) for non-alcoholic options that still feel special.
- Garnish the station with fresh herbs, small potted plants, or a single vase of seasonal flowers.
The visual presentation of your drink station tells guests that every detail has been considered.
Create a Dessert Display Table That Wows
A dessert table creates a natural focal point and gives guests a reason to move around the space.
- Choose a single-color palette for your desserts and display elements (white and gold, terracotta and sage, etc.).
- Use tiered stands, cake domes, and wooden boards to vary height and create visual interest.
- Label each item with small handwritten cards for a personal, artisanal touch.
- Position the table near soft lighting so desserts look their absolute best after dark.
Furniture That Works for Both Parties and Quiet Evenings
The best glamping party furniture is versatile enough to use year-round.
- Lightweight rattan chairs are stackable, weather-resistant, and photographically beautiful.
- A modular outdoor sofa (sectional pieces you can rearrange) adapts to any group size.
- Collapsible wooden dining tables can seat 8–10 people and fold flat for storage.
- Use storage baskets under tables and benches to keep blankets and accessories organized without cluttering the visual space.
📌 Save this glamping party layout guide! 📌
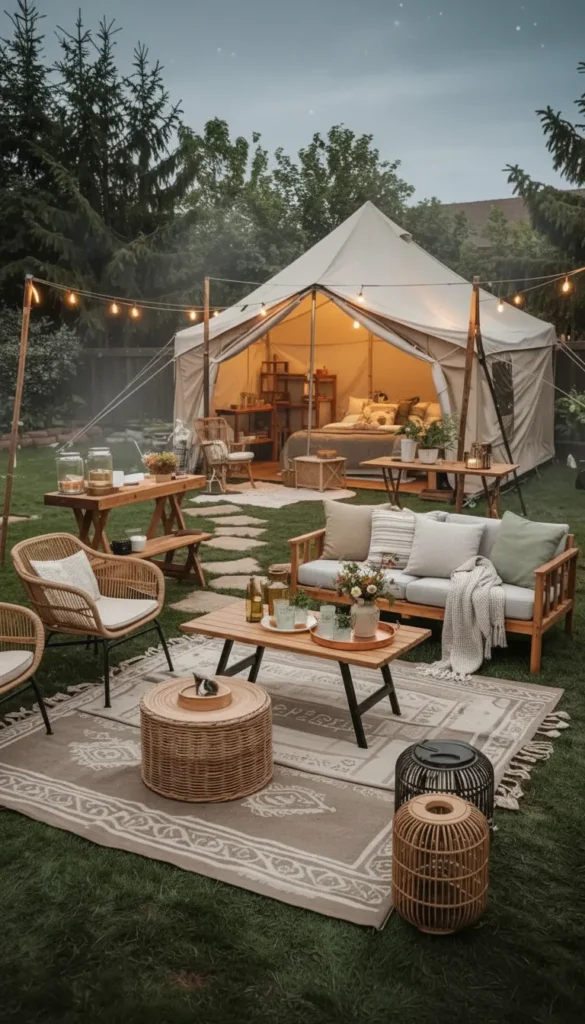
The key principle: design for flow. When guests can move comfortably and everything has a clear purpose, the party feels effortless — even when it took significant planning to create.
Glamping in Backyard Ideas for Small and Large Spaces
Not every backyard is a sprawling estate. The good news is that glamping works in almost any outdoor footprint — you just need to design for the space you have, not the space you wish you had.
Small Spaces: Think Vertical and Modular
Compact patios, narrow side yards, and small urban gardens can all host beautiful glamping setups.
- Hang lanterns from fence rails, overhead wires, or wall hooks instead of using floor space for lamp stands.
- Install wall-mounted shelves (cedar or teak hold up outdoors) for plants, candles, and decorative objects.
- Use a compact dome tent (8–10 ft diameter) instead of a bell tent. It creates the glamping atmosphere without dominating the space.
- Choose foldable, stackable furniture that can be cleared away easily after use.
One of the most effective techniques for small spaces is defining your “room” with a single outdoor rug. Even a 5×7 ft rug can transform a patio corner into a distinct glamping zone.
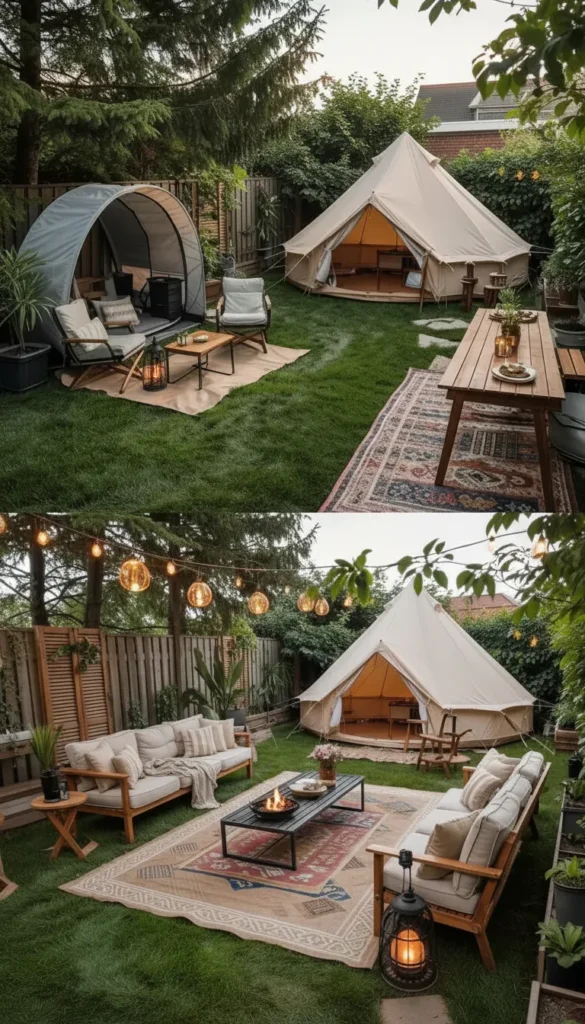
Medium Spaces: Create Separate Zones
A medium-sized yard (roughly 20×30 ft or more) gives you enough room to create genuinely separate experiences within the same space.
- Designate one corner as the sleeping and lounge zone with your tent and seating.
- Create a dining zone with a folding table and chairs at least 10 feet away.
- Add a fire pit or portable heater between the zones as a natural gathering point.
- Use potted plants (tall ornamental grasses, bamboo, or olive trees) as natural dividers between zones.
📌 Pin this small-space glamping solution! 📌
The fire pit is particularly effective in medium-sized yards. It acts as a campfire (creating immediate atmosphere) while also providing practical warmth that extends your glamping season into cooler months.
Large Spaces: Go Full Resort Mode
A large backyard allows you to go beyond glamping and create something that genuinely resembles a boutique outdoor hotel.
- Set up a full-size bell tent (14–16 ft) as the main sleeping space.
- Add a canopy daybed or outdoor chaise lounge section as a separate relaxation area.
- Create a long dining setup (8–10 person table) with a pergola overhead for shade and string lights.
- Install stepping stone pathways between areas to guide movement and add visual structure.
- Consider a secondary smaller tent for storage, dressing, or overflow sleeping space.
Measuring Before You Commit
Regardless of yard size, always measure before purchasing or renting large items.
- A 14 ft bell tent needs approximately 20×20 ft of clear ground when fully staked with guy ropes.
- A 6-person dining setup needs roughly 10×12 ft of usable space.
- Leave at least 5 ft of clearance between any tent and open flame sources.
- Outdoor sofas typically need 4–6 ft of depth plus walking clearance behind.
Adaptable Layouts Are Your Best Asset
The most successful backyard glamping setups are ones that can flex between functions.
- A quiet evening retreat might use the same layout as a weekend birthday party — just with added decoration and a drink station.
- Removable rugs and modular furniture make reconfiguration easy without disassembling the entire setup.
- Invest in quality pieces that serve multiple seasons, not single-use decorations.
📌 Save this space-planning approach for any yard size! 📌
Whether you have 200 square feet or 2,000, the principles remain the same: define zones clearly, measure before you commit, and design for flexibility. A thoughtful small setup always beats a cluttered large one.
Glamping at Home Backyards – Creating a Resort-Style Ambiance
The difference between a nice backyard and a resort-style retreat is almost entirely about intentional ambiance. It is the layering of sensory details — visual, tactile, auditory, and olfactory — that makes guests feel transported.
Start with a Cohesive Color Palette
Resort spaces do not use random colors. They choose two or three complementary tones and repeat them consistently.
- Neutral anchors (white, cream, warm gray, natural linen) create a calm, expansive feeling.
- Add one accent color (terracotta, sage green, dusty blue, or blush) through cushions, throws, and pottery.
- Use natural wood and woven textures as the bridge between your tent and your outdoor furniture.
- Avoid mixing too many patterns. One bold pattern (a printed rug or striped cushion cover) with solid accents is the professional approach.
Your color palette should feel like it belongs to the natural environment. Think earth tones, botanical greens, and the warm glow of candlelight.
Design Pathways That Guide the Experience
In resort design, pathways tell guests where to go and create a sense of arrival.
- Use flat stepping stones (slate, sandstone, or concrete pavers) to connect zones.
- Line pathways with solar-powered stake lights that activate automatically at dusk.
- Flank the pathway leading to your tent entrance with potted lanterns or small topiaries for a ceremonial feel.
- Keep pathways at least 24 inches wide for comfortable single-file movement.
📌 Pin this resort-style backyard ambiance guide! 📌
A clear, lit pathway creates anticipation. When guests walk toward your tent and see it glowing ahead of them, the experience has already begun.
Layer Your Lighting in Three Levels
Lighting professionals design in layers: overhead, midlevel, and ground level. The same principle applies to backyard glamping.
- Overhead: String lights, hanging lanterns, or a lit pergola canopy.
- Midlevel: Table lamps, wall sconces on fence posts, and lanterns on side tables.
- Ground level: Solar path lights, candles in hurricane holders, and low LED spotlights aimed at plants or water features.
Never rely on a single light source. Multiple levels of warm light create depth, mystery, and the unmistakable sense of a carefully designed space.
Add Outdoor Curtains for Privacy and Drama
Outdoor curtains are one of the most underused tools in backyard glamping design.
- Hang sheer weather-resistant fabric panels from a pergola or DIY wooden frame to frame your seating area.
- Use natural linen or canvas for a relaxed, organic look. Avoid synthetic fabrics that look plastic in natural light.
- Pull curtains partially closed to create intimacy without fully enclosing the space.
- Add curtain tie-backs made of natural rope for a nautical-meets-glamping aesthetic.
Incorporate a Refreshment Station for Everyday Luxury
A permanent (or semi-permanent) refreshment station transforms your backyard from a party setup to a daily resort ritual.
- Keep a small weatherproof cabinet or bar cart stocked with a kettle, coffee press, and your favorite teas.
- Display ceramic mugs, a sugar bowl, and a small cutting board with seasonal fruit nearby.
- Add a compact outdoor-rated mini fridge for chilled drinks if your setup is semi-permanent.
- Position the station close to the lounge area so morning coffee and evening cocktails both feel effortless.
📌 Save this resort ambiance strategy! 📌
Use Subtle Sound and Scent
The most immersive resort experiences engage all five senses. Your backyard can do the same.
- A small Bluetooth speaker playing soft instrumental music (jazz, ambient, acoustic) adds an invisible layer of atmosphere.
- Citronella candles or a mosquito-repelling diffuser keep bugs away while adding ambient fragrance.
- Wind chimes placed strategically create natural, soothing sound that responds to the environment.
- Lavender, eucalyptus, or rosemary planted in pots near seating areas release fragrance naturally as guests brush past them.
The goal is not to overwhelm the senses but to layer them gently. Each element should feel like it belongs naturally in the space.
Backyard Glamping DIY Ideas – Beautiful Setups on Any Budget
You do not need to spend thousands of dollars to create a genuinely beautiful glamping experience. With the right DIY approach, a modest budget and a few weekend afternoons can produce results that rival professionally designed setups.
Build Your Own Wooden Platform Base
A platform base elevates your tent (literally and aesthetically) and solves several practical problems at once.
- Materials needed: 2×6 lumber for the frame, 1×6 cedar decking boards for the surface, deck screws, and galvanized joist hangers.
- Standard platform size for a compact tent setup: 8×10 ft, approximately 8–12 inches off the ground.
- Treat all wood with an outdoor wood sealer before assembly to extend life and prevent warping.
- Add rubber furniture feet to the underside to protect your lawn and prevent moisture buildup.
Cost estimate: $80–$150 in materials for a basic platform. A similar piece from an outdoor retailer would cost $400–$600.
📌 Pin this DIY platform build guide! 📌
Create a DIY String Light Frame
Freestanding string light frames give you control over where your overhead lighting goes without relying on existing trees or structures.
- Materials: 4×4 pressure-treated posts, concrete mix, eye bolts, and outdoor string lights.
- Sink posts 18–24 inches into the ground in concrete for stability. Allow 48 hours to cure before tensioning lights.
- Space posts approximately 10–12 ft apart for a generous light canopy.
- Run at least 3 parallel strands of lights for a dense, glowing effect.
This DIY approach is also adjustable — you can move posts seasonally or reconfigure for different party layouts.
Sew or Upcycle Your Own Cushion Covers
New outdoor cushions can be expensive. Making or refreshing your own covers is one of the highest-value DIY projects in glamping.
- Purchase outdoor fabric (solution-dyed acrylic) by the yard. It is fade-resistant, water-repellent, and available in hundreds of patterns.
- A basic envelope-style cushion cover requires zero advanced sewing — just four straight seams.
- Upcycle old throw pillows by replacing worn covers with fresh outdoor fabric to match your new palette.
- Mix solid covers with one printed pattern for a professional, curated look.
Cost savings: Custom outdoor cushion covers typically cost $30–$60 each. DIY versions cost $8–$15 per cover in materials.
Make Your Own Lanterns and Lighting Accents
Decorative lanterns are glamping essentials, and they are surprisingly easy to make.
- Mason jar lanterns: Fill wide-mouth mason jars with sand and a tea light. Hang with galvanized wire from tent poles or wooden stakes.
- Rope-wrapped bottles: Wrap wine bottles with natural jute rope using craft glue, insert a taper candle or LED flameless candle.
- Painted tin can luminaries: Punch patterns into tin cans, paint the exterior, and use as ground-level candle holders along pathways.
These DIY accents cost almost nothing and create exactly the kind of warm, handcrafted atmosphere that defines great glamping.
📌 Save this DIY glamping décor strategy! 📌
Build a Simple Canopy Frame for Shade and Rain Coverage
A freestanding canopy frame outside your tent adds practical shelter and visual structure to your setup.
- Materials: Square steel conduit or thick wooden dowels, corner connectors (available at hardware stores), and a weatherproof canvas or tarpaulin.
- Build a 10×10 ft frame for a compact shaded area or 12×16 ft for a full outdoor room.
- Cover with waxed canvas for a premium look or a heavy-duty outdoor polyester tarp for maximum weather protection.
- Reinforce corners with additional guy rope staking on windy sites.
Cost estimate: $60–$120 for materials. A purchased equivalent starts at $300.
Add a Fire Feature on Any Budget
A fire feature extends your glamping season and creates an immediate gathering focal point. Options exist at every price point.
- DIY fire bowl: A galvanized steel tub from a farm supply store ($25–$35) makes an excellent, rustic fire bowl.
- Store-bought fire pit: Portable steel fire pits start at $50 and are effective for small gatherings.
- Propane fire table: A more permanent option ($200–$500) with adjustable flame and no wood mess.
- Solar-powered faux fire: LED flame speakers that mimic a fire visually while playing crackling sound ($40–$80) work beautifully for rental properties or HOA-restricted spaces.
Always maintain a 5-foot clearance from the tent and any flammable décor. Keep a fire extinguisher or bucket of sand within arm’s reach.
DIY Fragrance and Ambiance Extras That Cost Almost Nothing
Some of the most impactful glamping details are completely free or nearly so.
- Herbs from your garden: Rosemary, lavender, and mint clipped and placed in small vases around the tent smell incredible and cost nothing.
- Natural pinecones: Collected from nearby parks and placed in baskets add texture and a subtle forest scent.
- Foraged branches: Eucalyptus, olive, or flowering branches placed in tall vases create organic drama for the price of a walk.
- Repurposed household blankets: Your nicest throws from inside the house look just as good outside. Just bring them in before morning dew sets in.
The truth about glamping DIY is this: the most memorable setups are not necessarily the most expensive. They are the most considered. Every detail that feels personal and intentional — a handwritten menu, a found object, a jar of homemade granola on the side table — communicates care. And care is what transforms a tent in a backyard into an experience worth remembering.
Conclusion
Your backyard has more potential than you realize. With a clear plan, a few key investments, and a genuine commitment to detail, it can become the escape you never knew you needed — available every weekend, on your own schedule, and entirely on your terms.
Start with one idea from this guide. Set up the tent. Hang the lights. Style the entrance. Take one evening to simply sit inside what you have created and notice how it feels. That feeling — that quiet sense of having made something beautiful with your own hands and your own vision — is exactly what glamping at home is all about.

“I share simple, beautiful and affordable home decor ideas to help you style every corner of your home with ease.